Delegating Customer Account Access via Agency
V1.0 – March 2023
| Version | Author | Description |
|---|---|---|
| V1.0 – 2023-03-17 | Gabriel Gutierrez 817435 | Initial Release |
INTRODUCTION
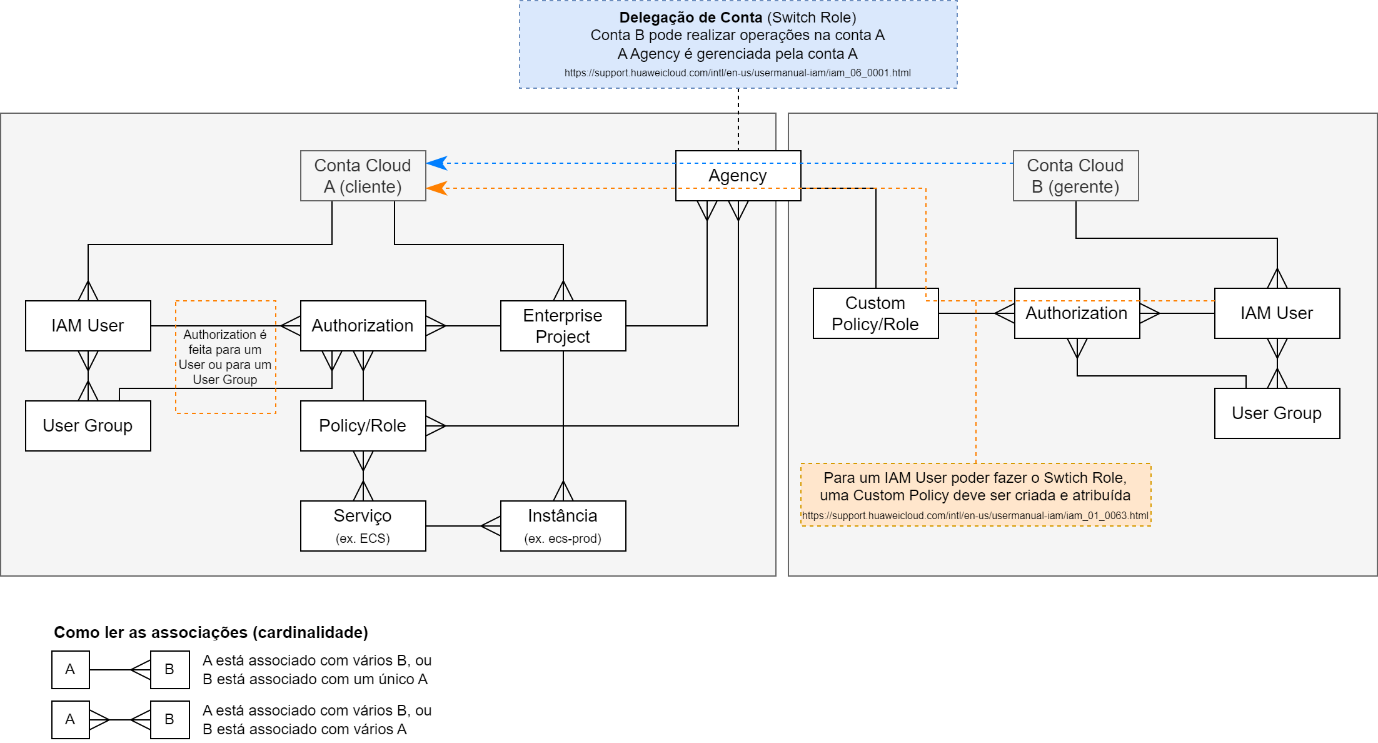
The Agency role allows the partner to be authorized to perform O&M on the client’s account. The client can delegate access to resources only to other accounts. The delegated accounts can then delegate access to IAM users under them.
When creating an Agency, the client can share their resources with another account or delegate an individual or team to manage their resources. The client does not need to share their security credentials (such as password and access keys) with the delegating party. Instead, the delegating party can log in with their own account credentials and then use the “Switch Role” function to access your account and manage your resources.
When a trust relationship is established between your account and the client’s account, you become a delegating party. By default, only your account and members of the administrators group can manage resources for the delegating party. To authorize IAM users to manage these resources, assign permissions to users.
PROCEDURE
POLICY CREATION
The first step is to create a Policy that allows IAM users to perform the “Switch Role” operation for a specific customer account.
-
The customer must create the Agency in their account, following the procedure described in the document “Account Delegation (customer procedure)”. The customer must provide the account name, the Agency name, and the Agency ID.
-
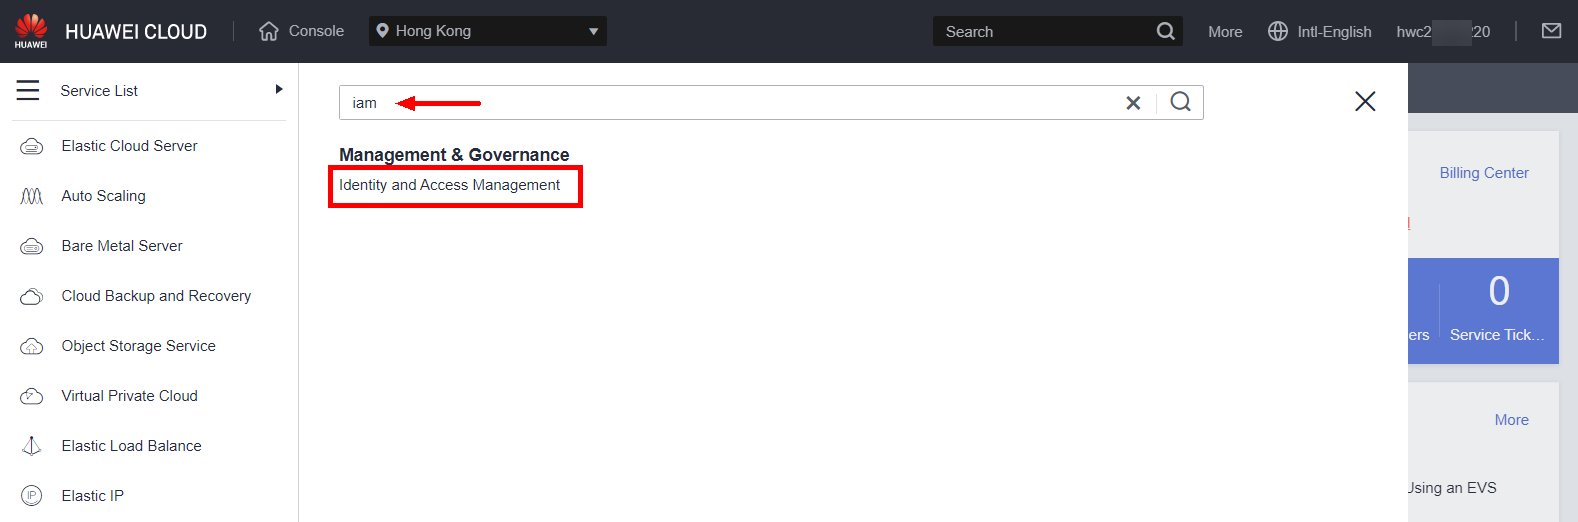
In the HUAWEI CLOUD Console, open the services menu on the left, search for “iam,” and select “Identity and Access Management.”
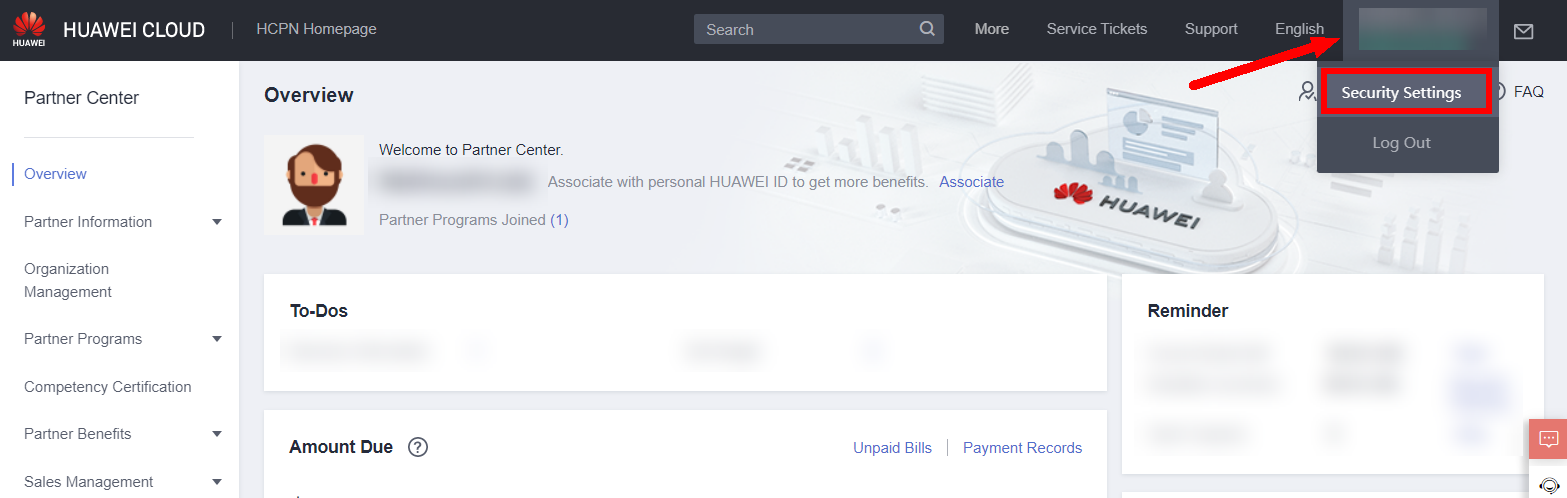
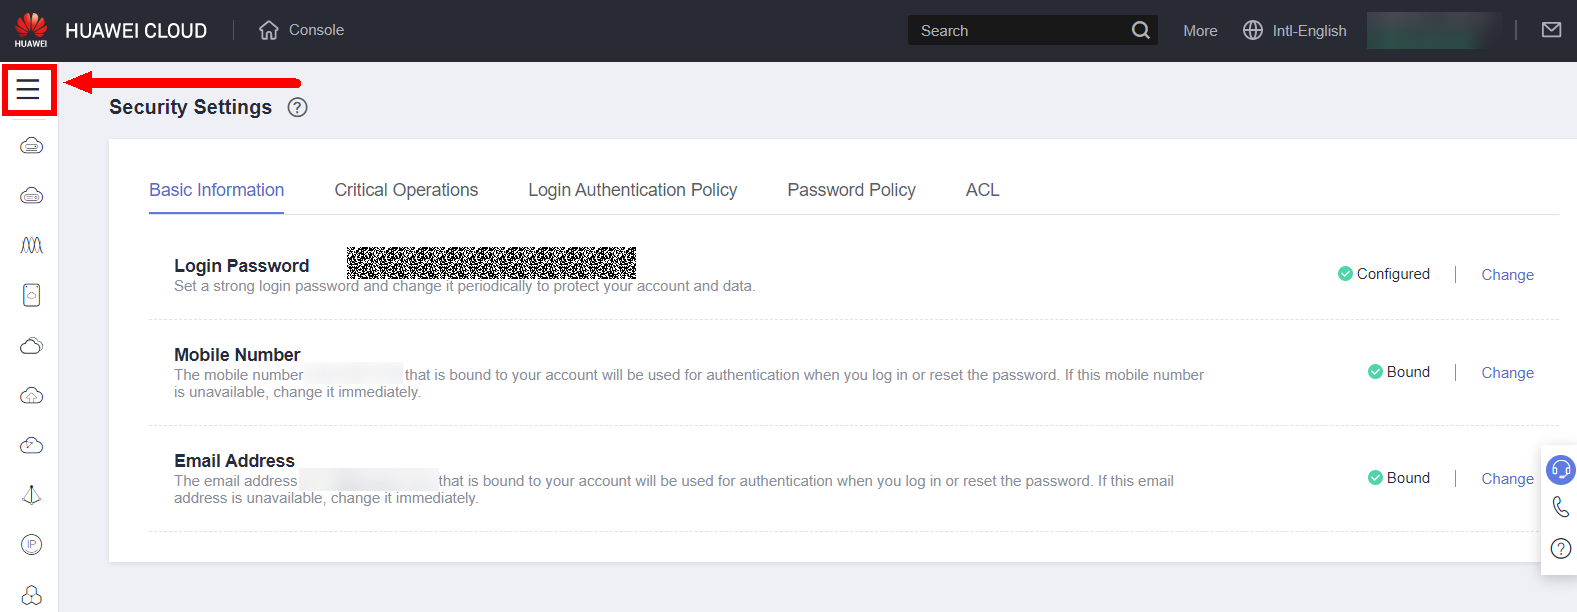
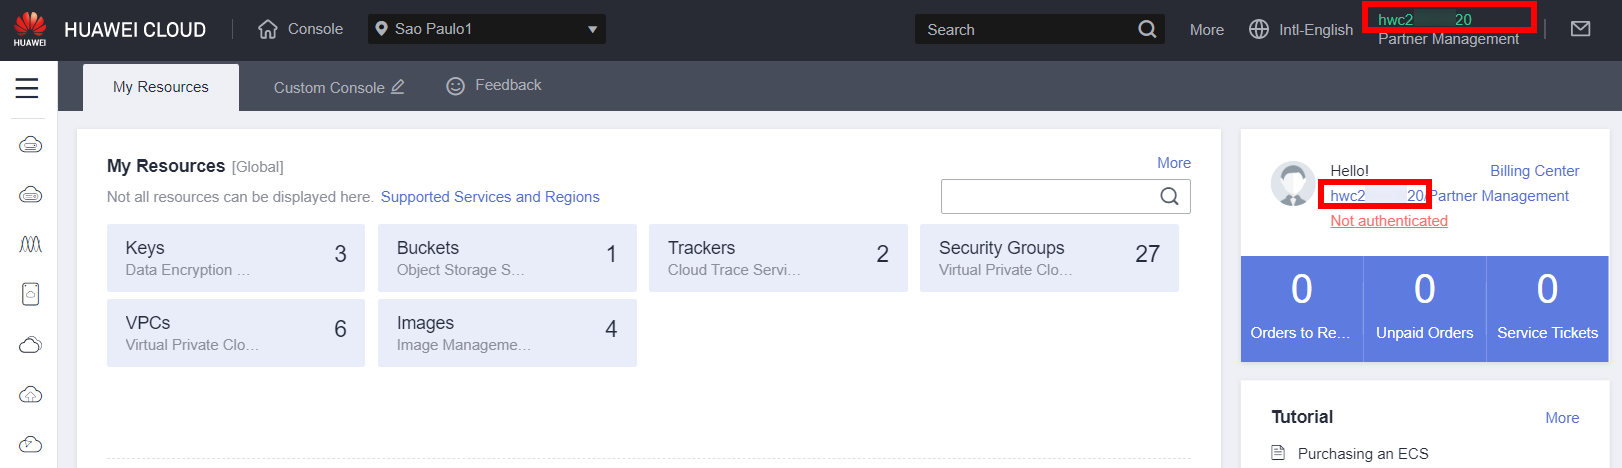
To access the HUAWEI CLOUD Console from the Partner Center, hover over the account name, select “Security Settings,” and then click the services menu on the left.
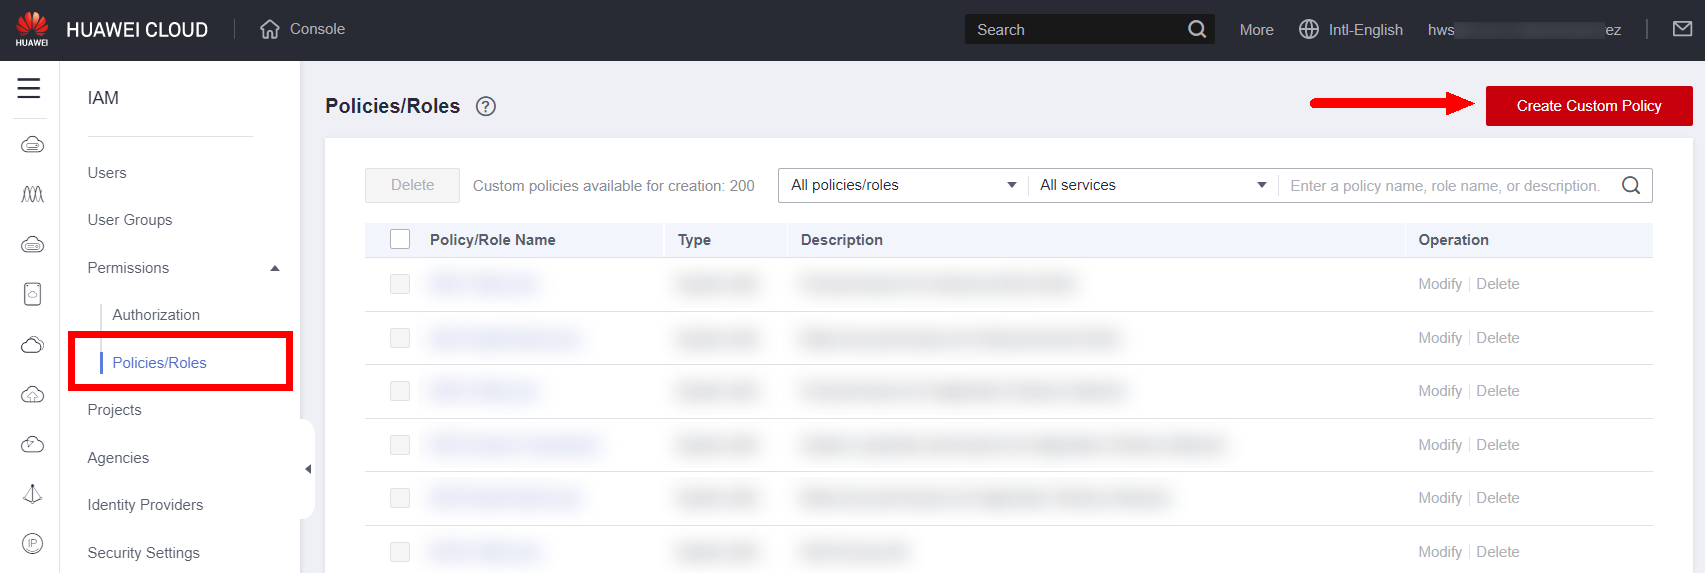
- In the menu on the left, click on “Permissions”, then on “Policies/Roles”, and then “Create Custom Policy” in the corner upper right
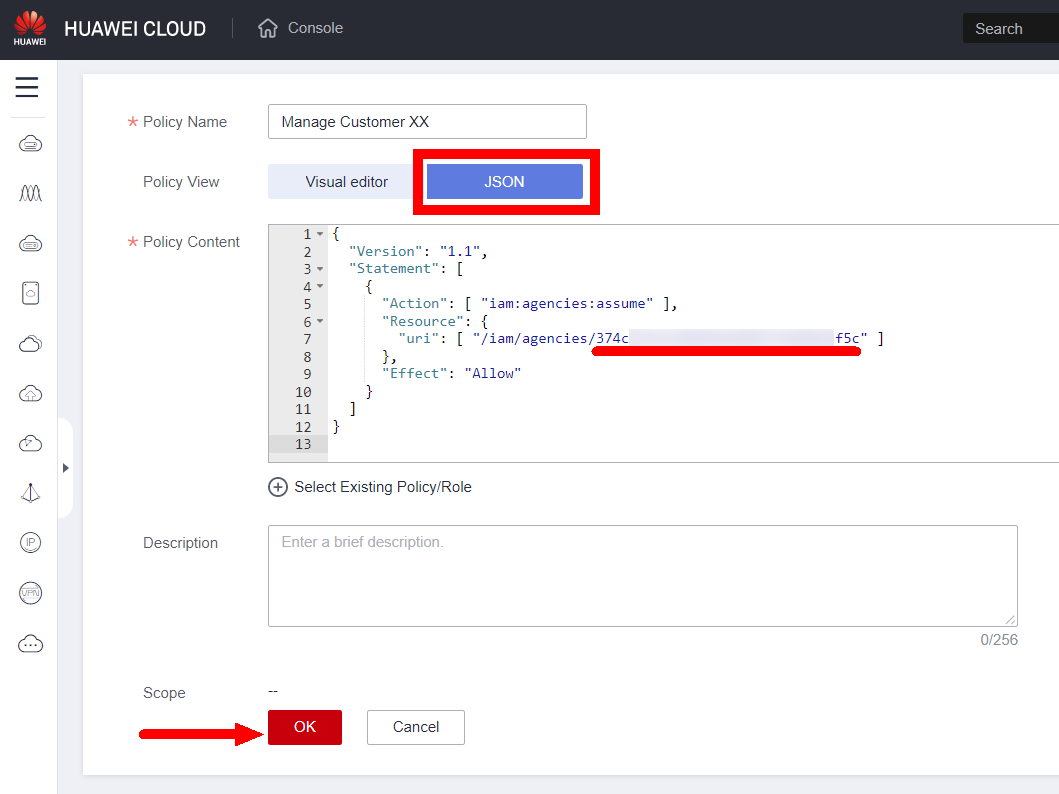
- Set a name for the Policy (“Manage Customer XX”, for example); select “JSON” in Policy View; in Policy Content, enter the following content, replacing xxxxx with the Agency ID provided by the client; Finally, click “OK”:
{
   "Version":"1.1",
   "Statement":[
      {
         "Action":[
            "iam:agencies:assume"
         ],
         "Resource":{
            "uri":[
               "/iam/agencies/xxxxx"
            ]
         },
         "Effect":"Allow"
      }
   ]
}
AUTHORIZATION
Once the Policy is created, you can associate it with an existing User Group or directly with an IAM User. The following will detail the process of assigning the Policy to a User Group called “user_A_group,” associated with an IAM User “user_A.” The following procedure must be performed from the “root” account.
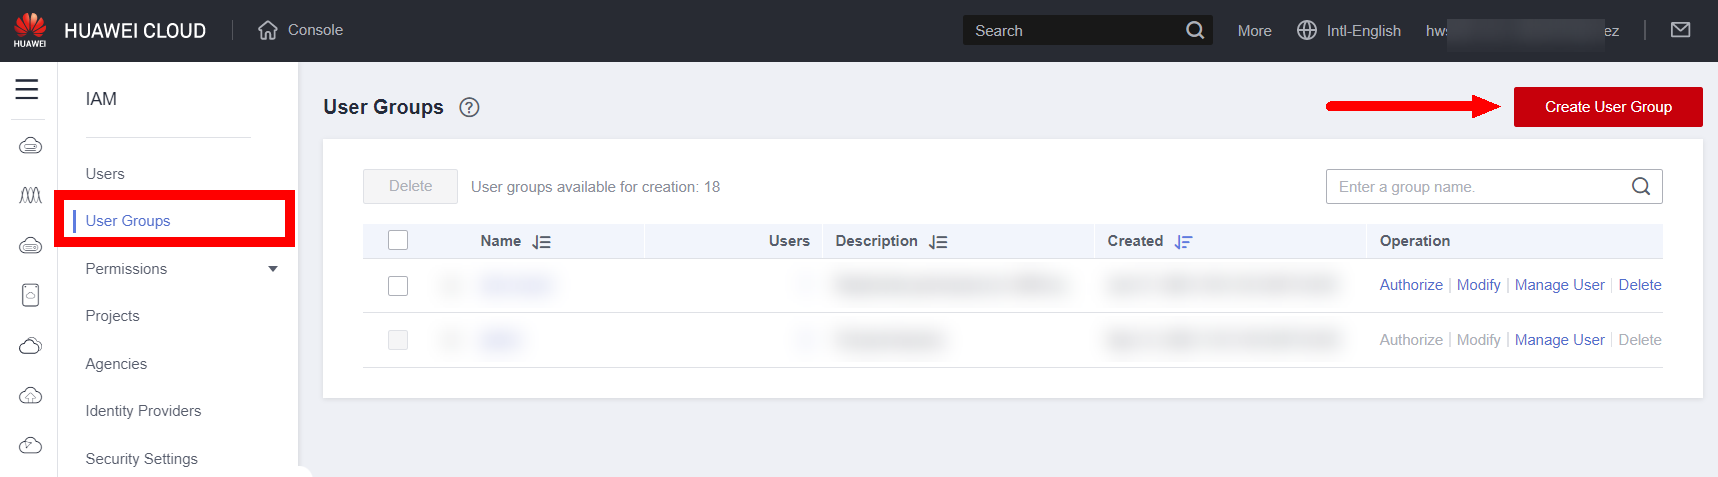
- On the IAM management page (section 2.1 step 2), select “User Groups” from the left-hand menu and click “Create User Group” in the upper-right corner:
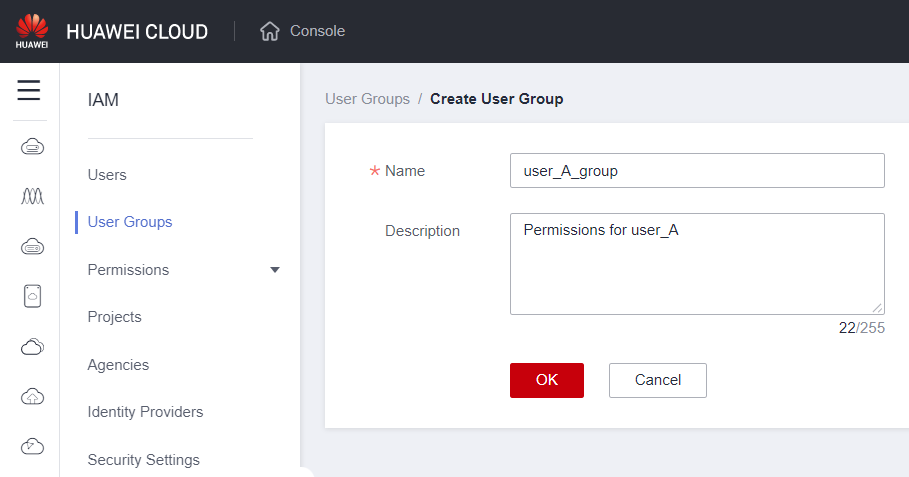
- Configure a name for the User Group and a description, if desired; then click “OK.”
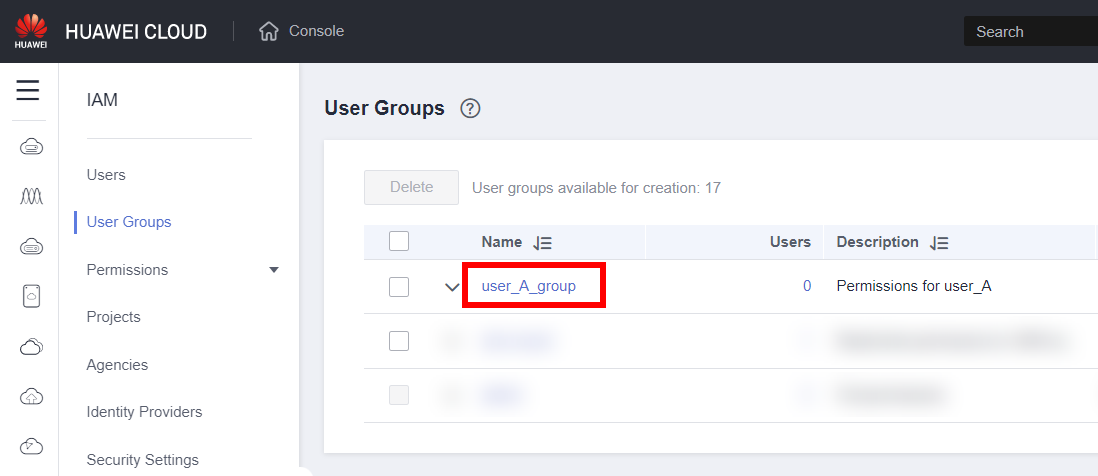
- In the User Groups list, click on the name of the created group
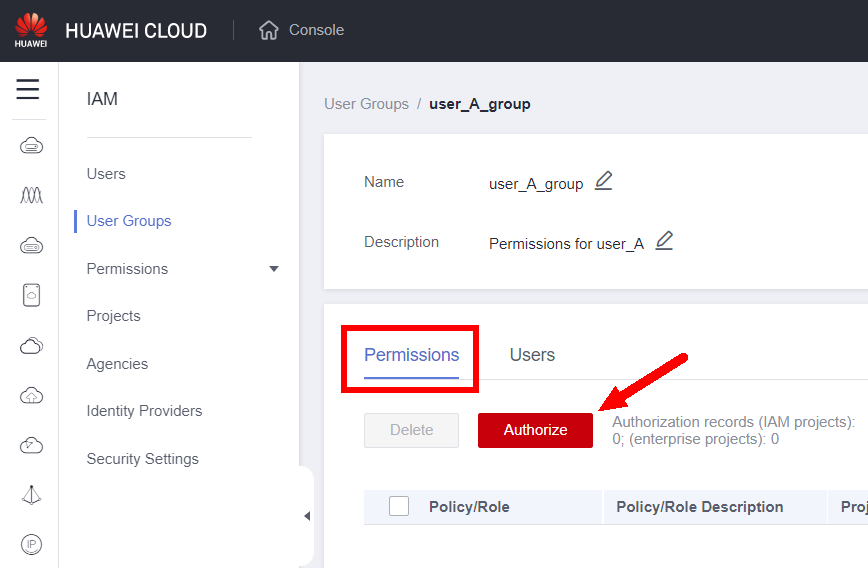
- In the “Permissions” tab, click “Authorize”
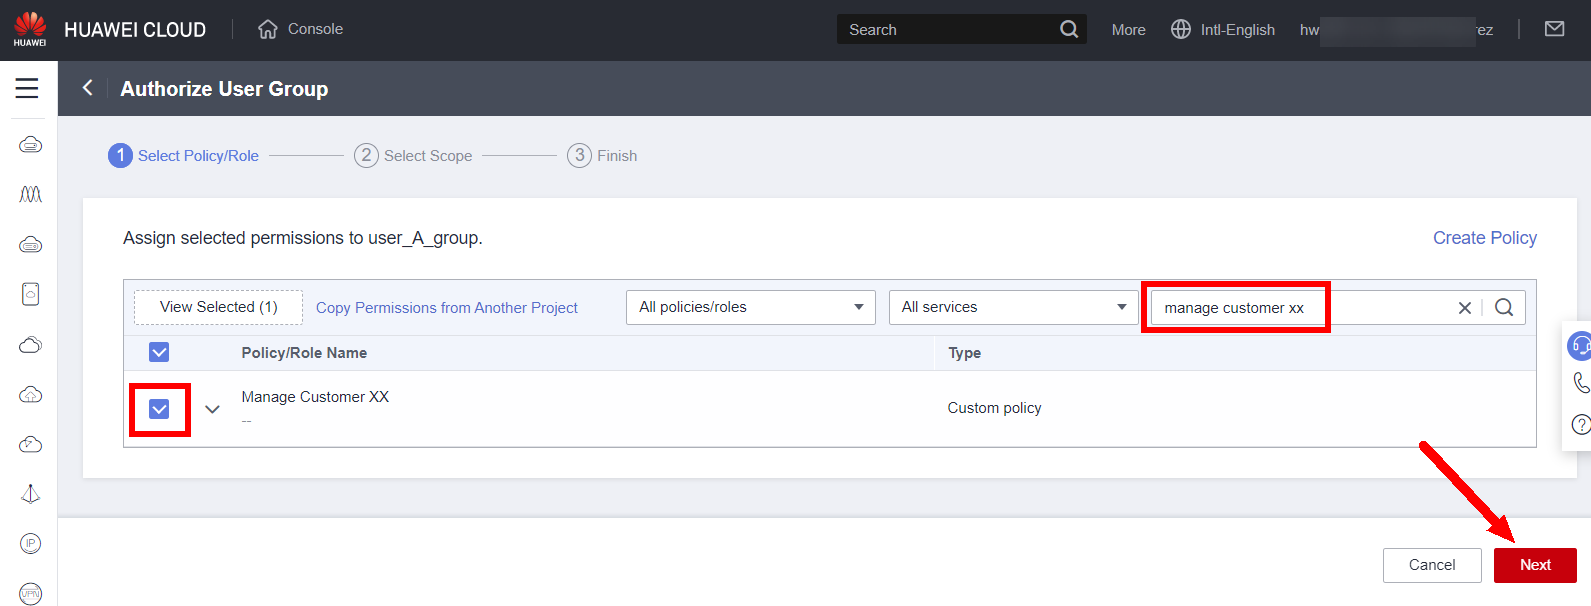
- Search for the name of the Policy you created previously, select the corresponding checkbox, and then click “Next”
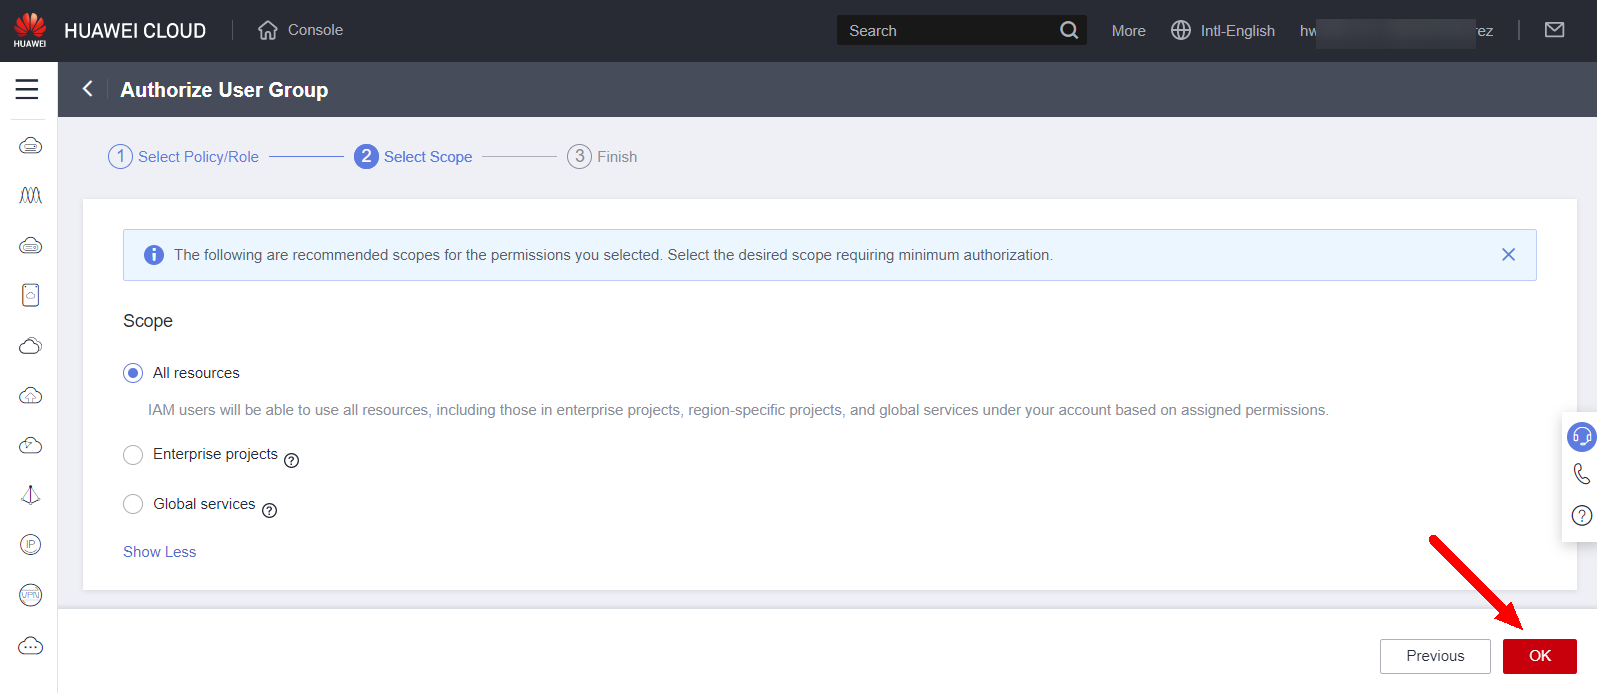
- On the next screen, click “OK,” then “OK” again to confirm, and then “Finish.”
- On the User Group details screen, click the “Users” tab and then “Add”:
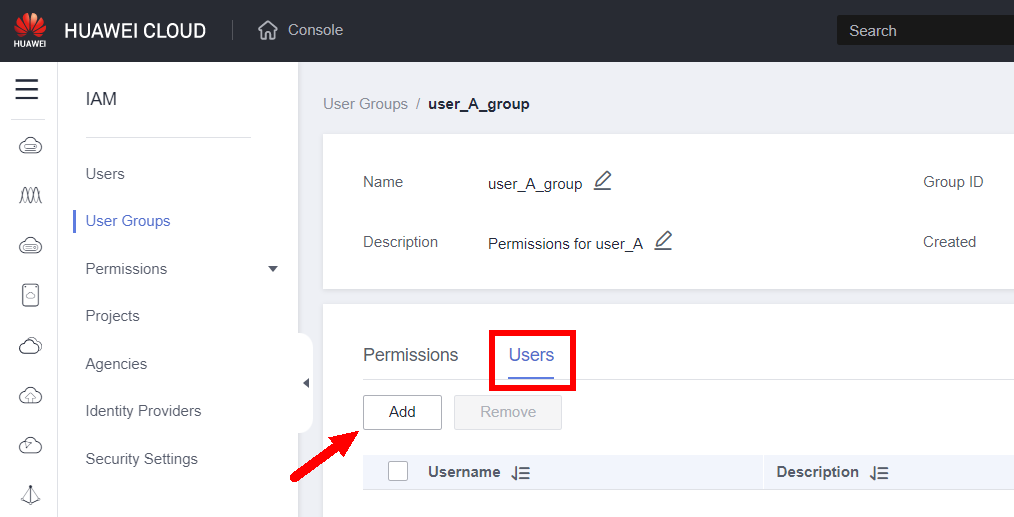
- Select user “user_A” and click “OK.”

From this point on, user “user_A” can use the “Switch Role” function to log into the customer account.
“SWITCH ROLE” CONFIGURATION (FIRST ACCESS)
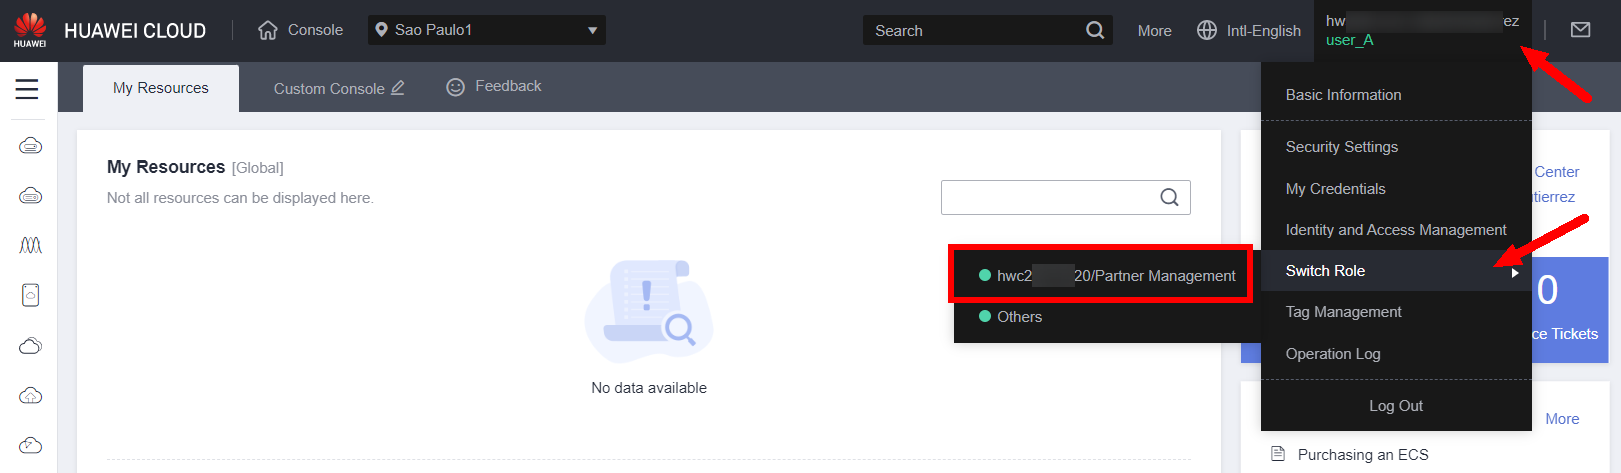
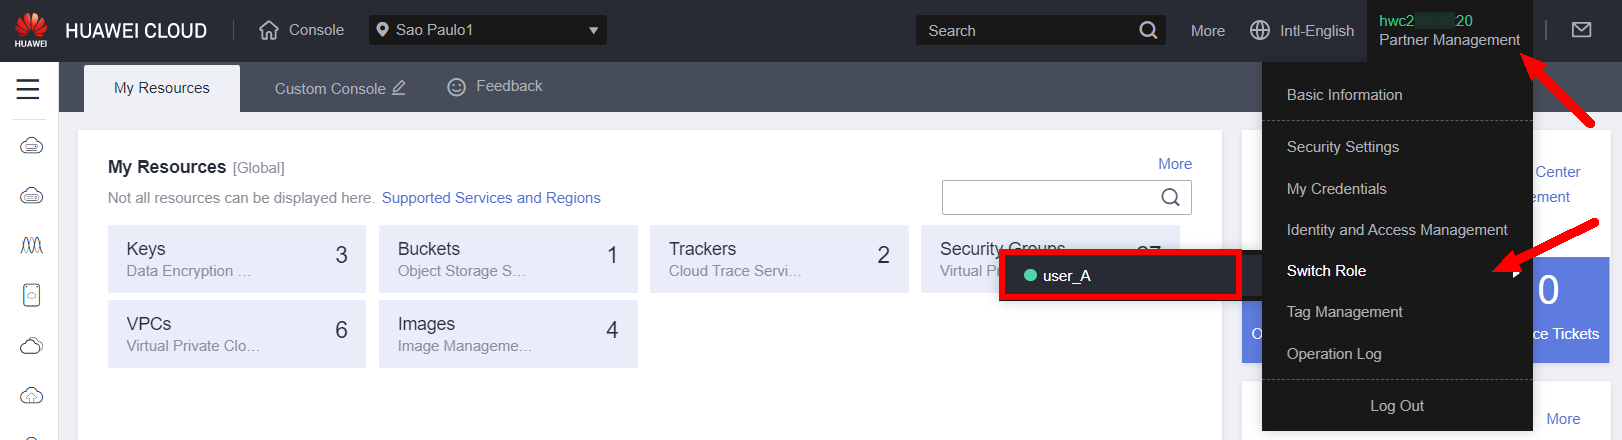
- Once logged in as the IAM user “user_A,” hover your mouse over the account name and select the “Switch Role” option from the menu that appears:
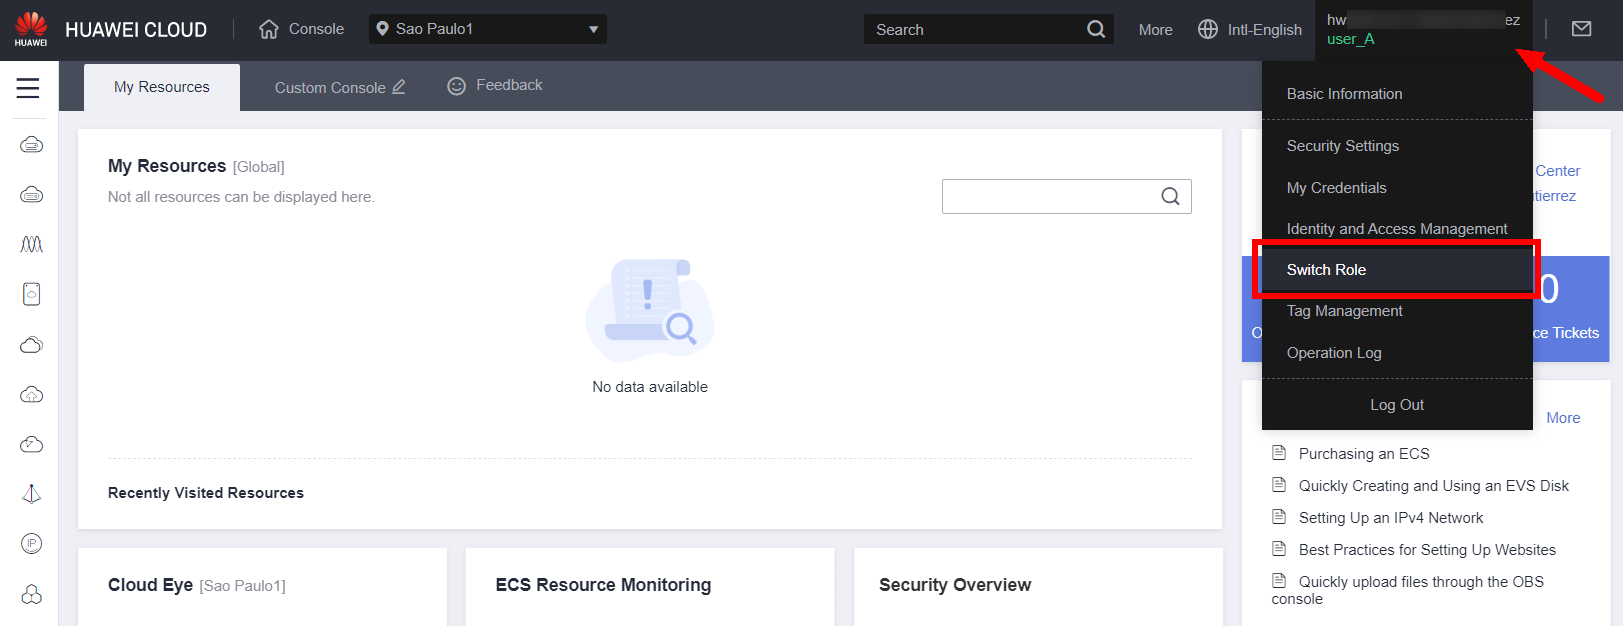
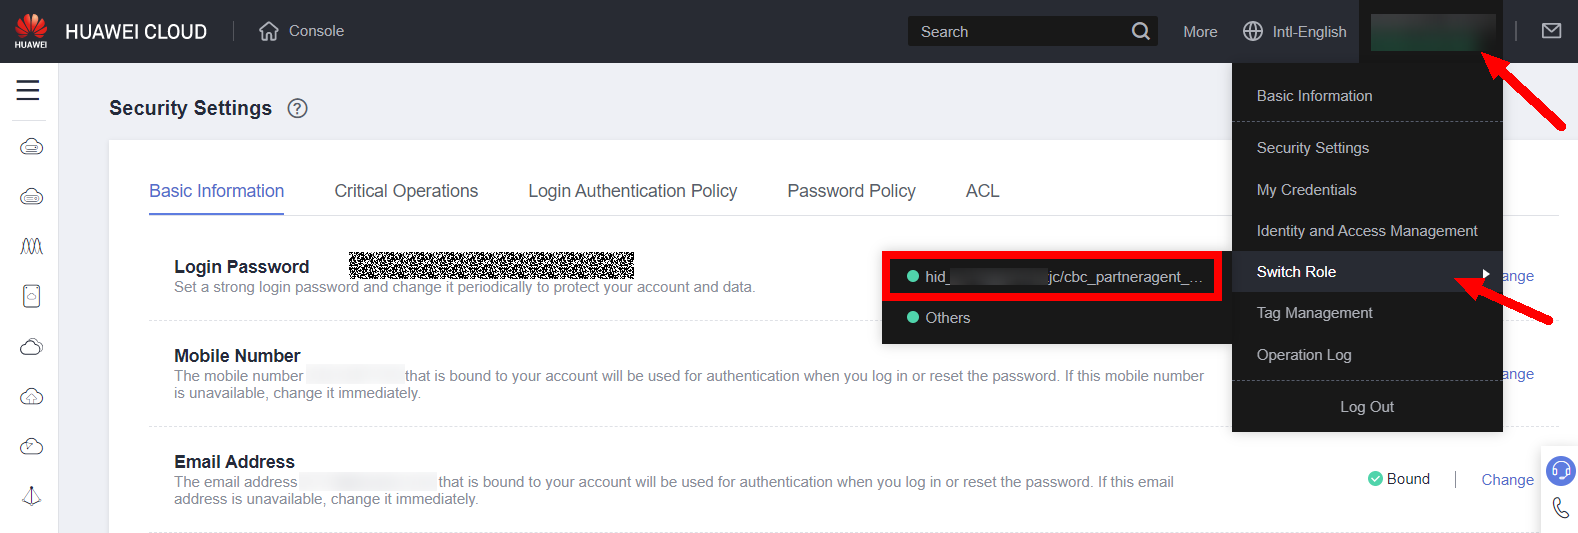
From the Partner Center, hover your mouse over the username, select the “Security Settings” option. Then, hover your mouse over the username again and select the “Switch Role” option. Role.”
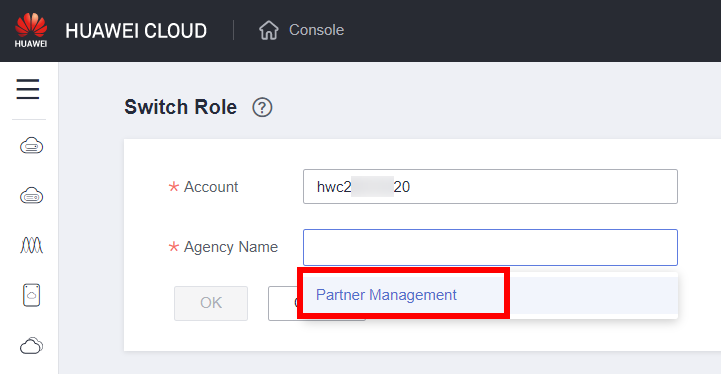
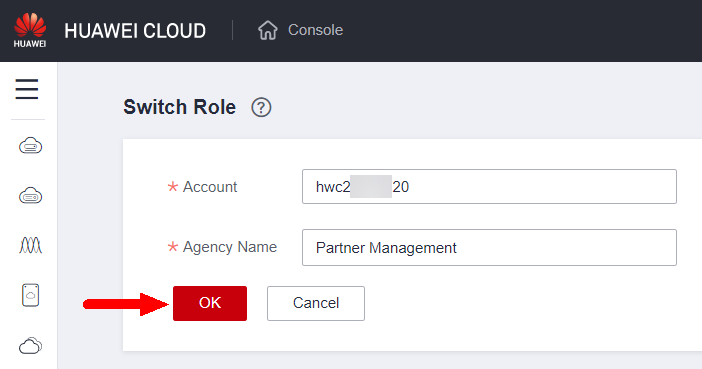
- Under “Account,” enter the client’s account name; then click in the “Agency Name” field and select the Agency created by the client (e.g., “Partner Management”); finally, click “OK”.
SWITCHING THE ROLE
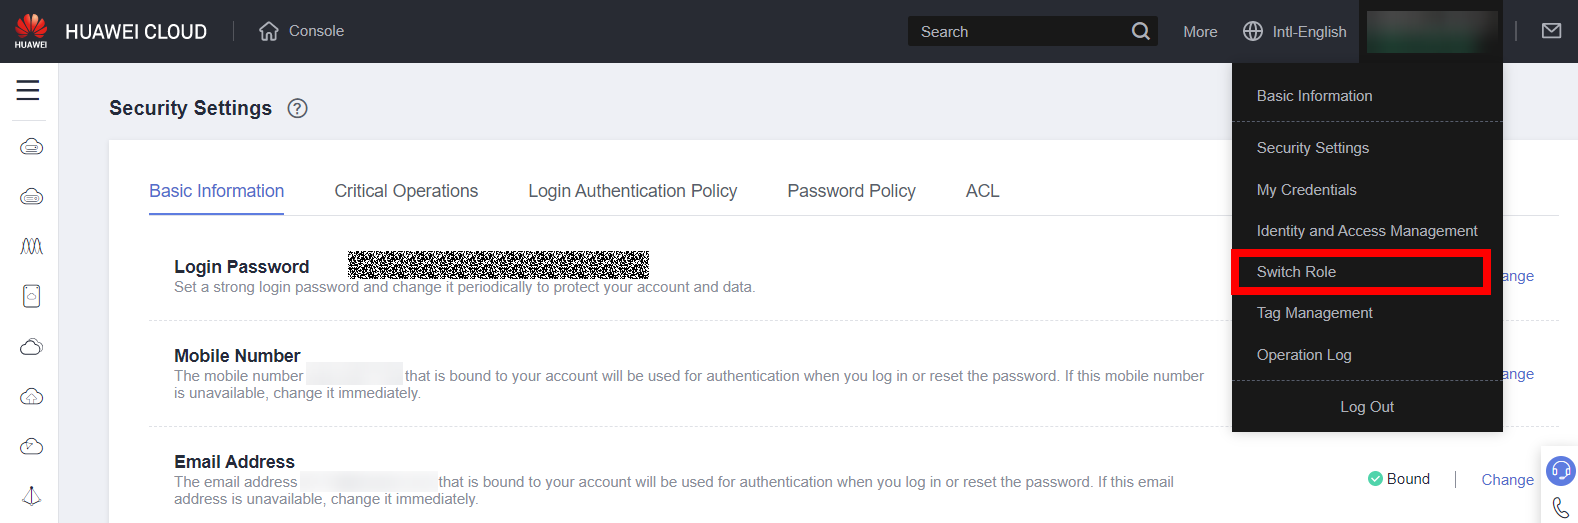
- In the console, hover over the account name, then click “Switch Role,” and finally select the account name. Customer.
From the Partner Center, hover over the username, select “Security Settings.” Then, hover over the username again, then “Switch Role,” and finally select the customer’s name.
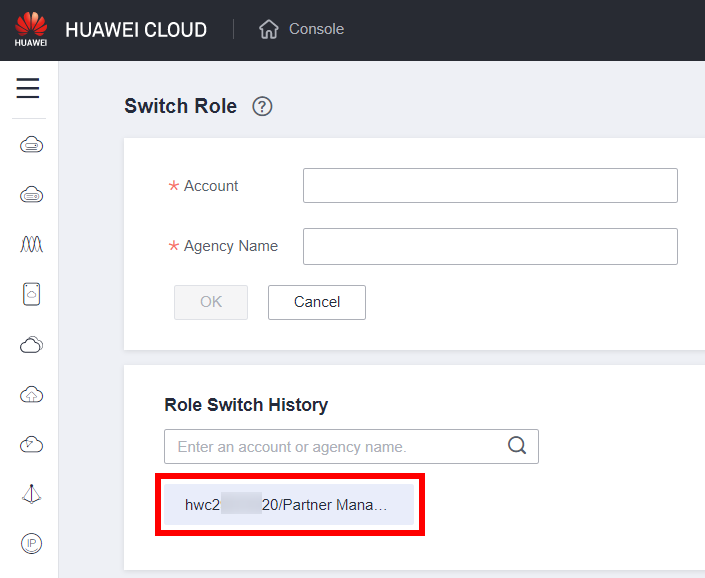
- If it doesn’t appear in the “Switch Role” submenu, click “Switch Role” or “Others.” Then, look for the customer account in the “Role Switch History” section and select the corresponding option.
Once done, it should appear in the menu from the previous step.
- From now on, you can operate the customer account.
- To log out of the customer account, simply hover over the account name, open the “Switch Role” menu, and click on the IAM user name.
REFERENCES
Delegating Resource Access to Another Account
https://support.huaweicloud.com/intl/en-us/usermanual-iam/iam_06_0001.html
Accessed on 2023-03-17
Creating an Agency (by a Delegating Party)
https://support.huaweicloud.com/intl/en-us/usermanual-iam/iam_06_0002.html
Accessed on 2023-03-17
(Optional) Assigning Permissions to an IAM User (by a Delegated Party)
https://support.huaweicloud.com/intl/en-us/usermanual-iam/iam_01_0063.html
Accessed on 2023-03-17
Switching Roles (by a Delegated Party)
https://support.huaweicloud.com/intl/en-us/usermanual-iam/iam_06_0003.html
Accessed on 2023-03-17