Creating a Custom Image for Training (PyTorch + CPU/GPU)
V1.0 – September 2025
| Version | Author | Description |
|---|---|---|
| V1.0 – 2025-09-22 | Diogo Hatz 00945205 | Initial Version |
Objective
This document aims to present the procedures required to create and execute an AI model training task running using a custom container image on Huawei Cloud through the ModelArts service. Creating custom images allows greater flexibility in runtimes and dependencies beyond those already specified in the service.
Specifications
Below is the list of runtime versions used in this document:
- Ubuntu 20.04
- Python 3.13.5
- Miniconda 3
- PyTorch 2.6.0
- PyTorchAudio 2.6.0
- PyTorchVision 0.21.0
OBS
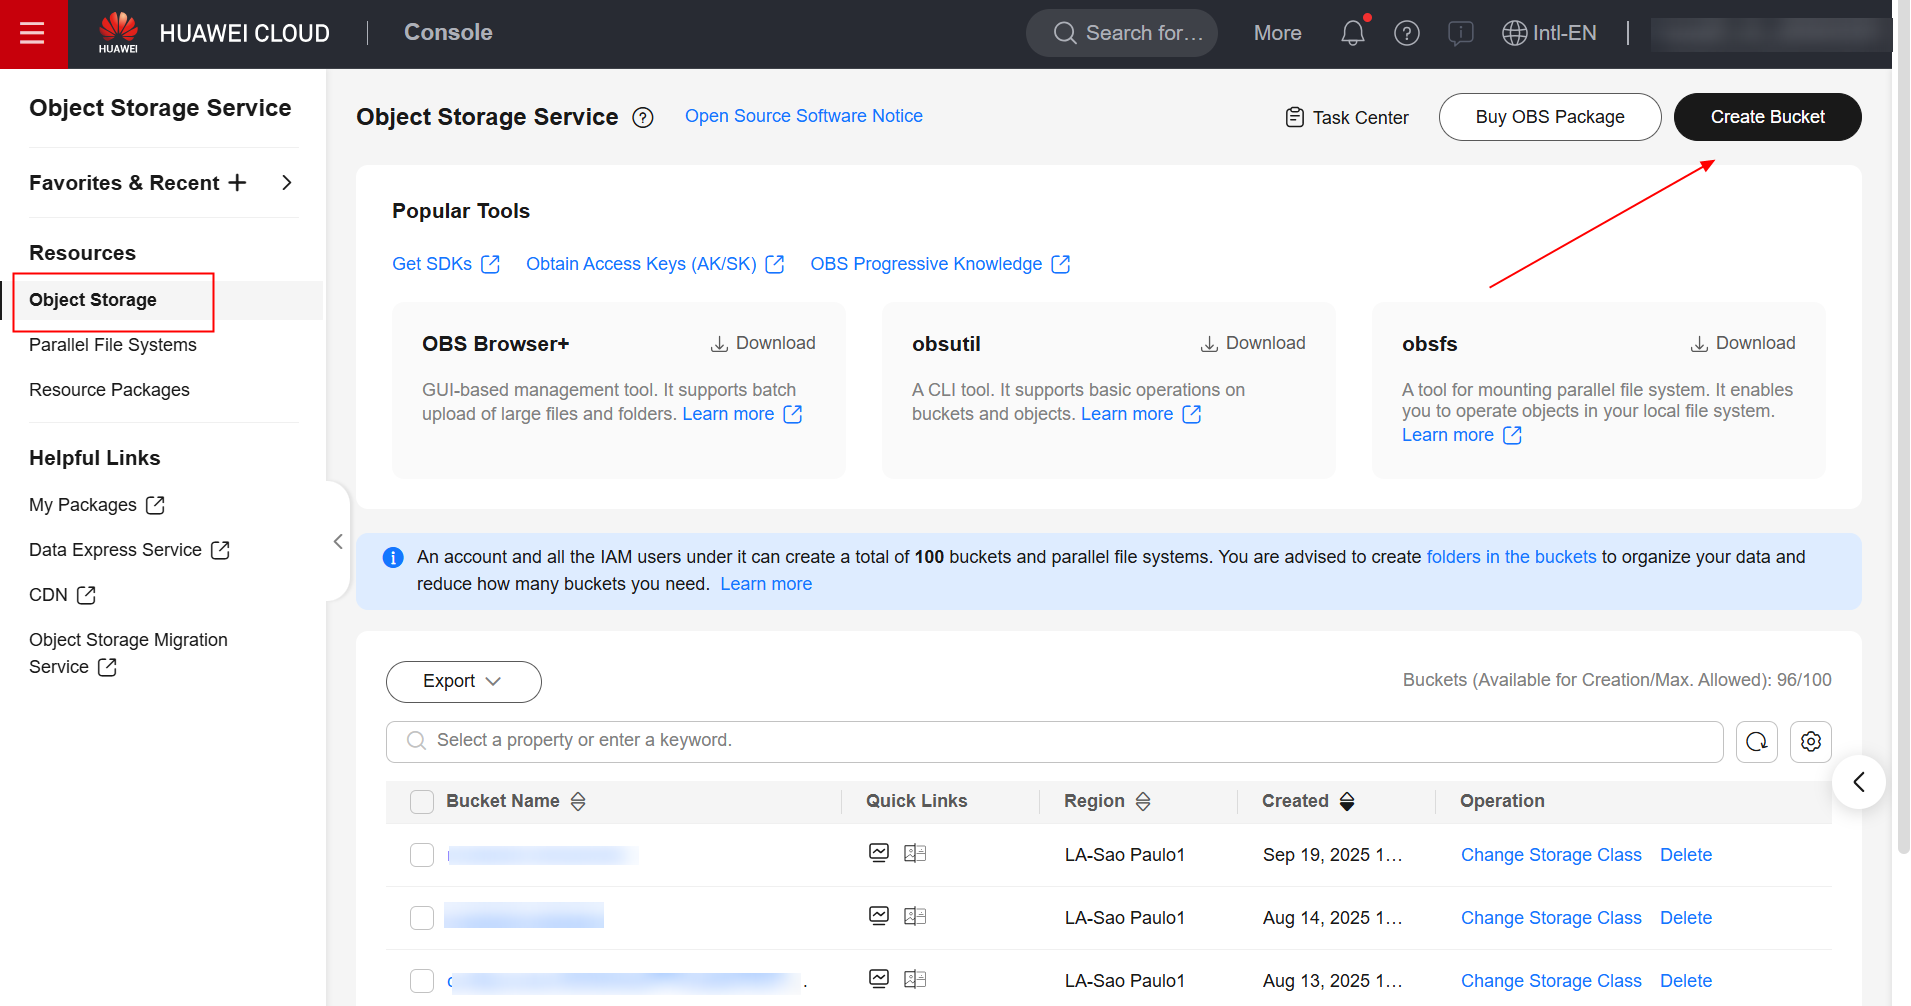
First, you need to create a bucket in the OBS service to store the training code to be executed and the execution logs of the task. To do this, navigate to the OBS service in the Huawei Cloud console and create a bucket.
Once you’ve created the bucket, create two folders within bucket: “pytorch” and “logs.” Within the “pytorch” folder, create another folder called “code.” Here’s the bucket structure:
bucket
├── pytorch
    ├── code
        ├── teste.py
├── logs
Once you’ve created the bucket structure, create a Python file called “teste.py,” paste the following Python code, and upload it to the “code” folder of the bucket.
import torch
import torch.nn as nn
import sys

print("Python version:", sys.version)
print("Python version info:", sys.version_info)

x = torch.randn(5, 3)
print(x)

available_dev = torch.device("cuda") if torch.cuda.is_available() else torch.device("cpu")
y = torch.randn(5, 3).to(available_dev)
print(y)
ECS
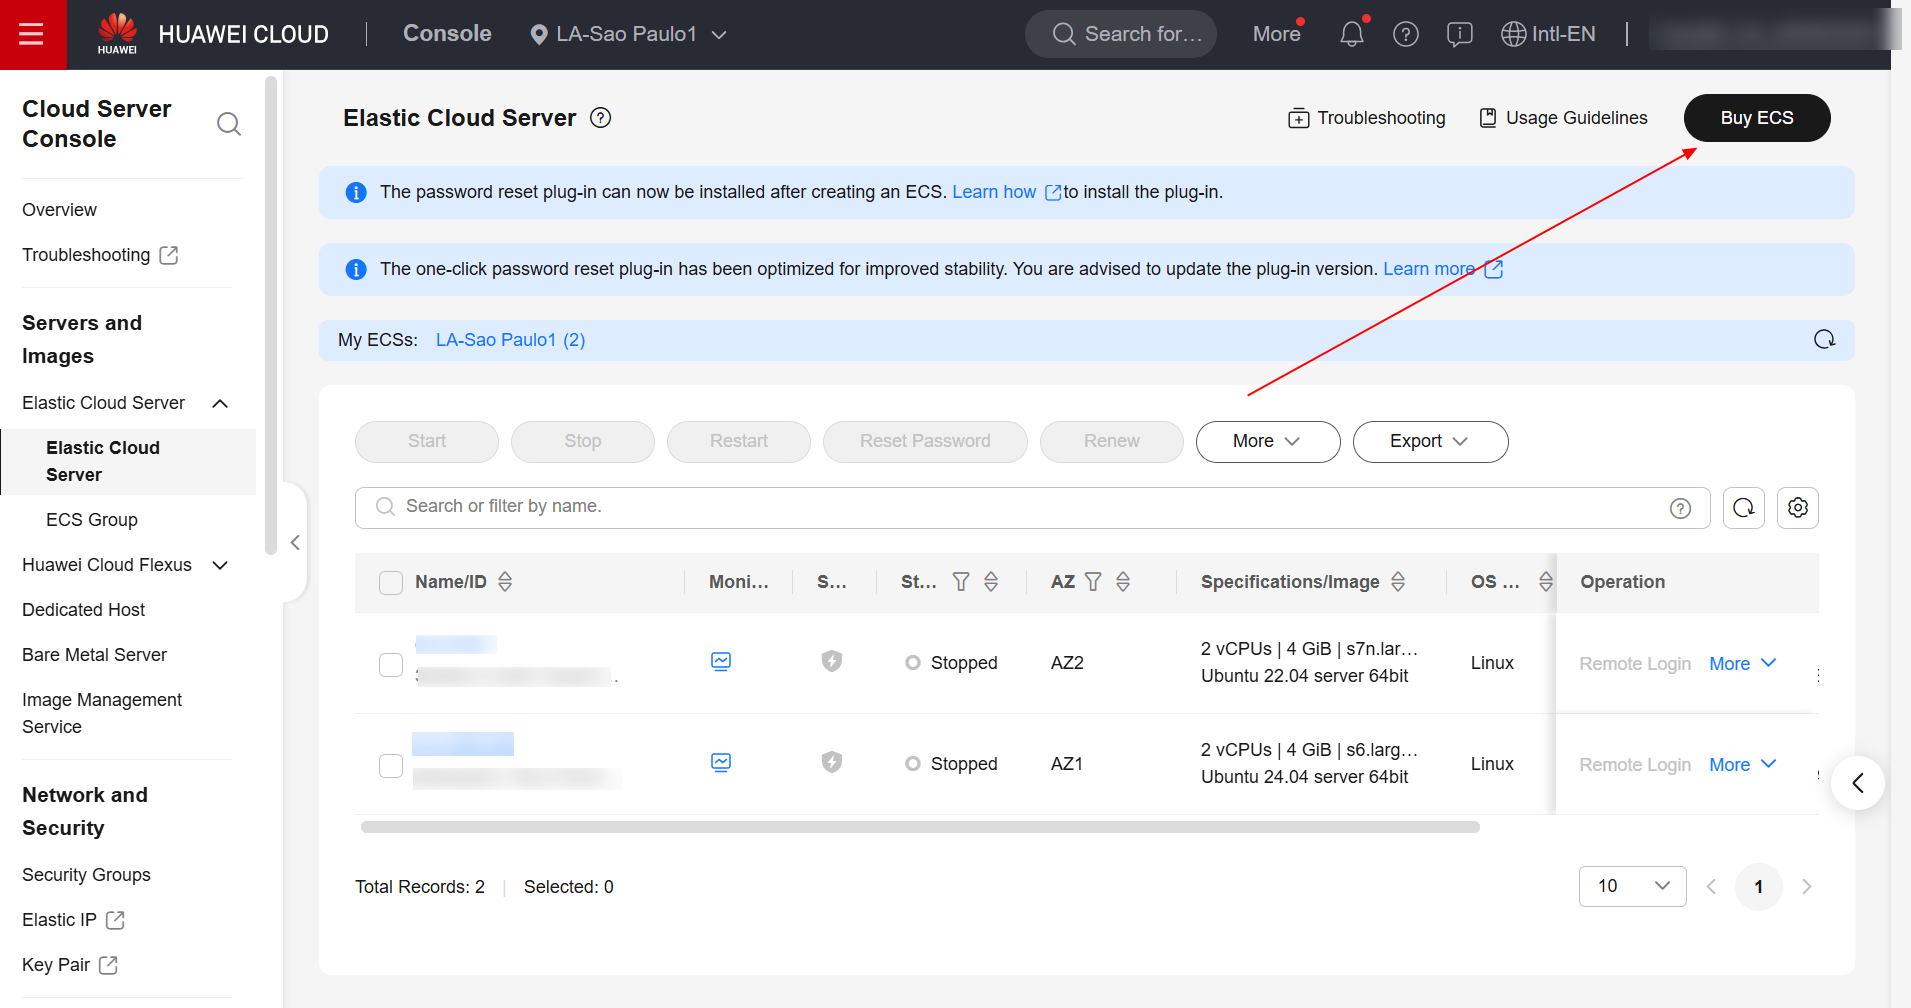
Having prepared the Python code to be executed by the training task, navigate to the ECS service in the Huawei Cloud console and create an ECS with the Ubuntu 20.04 operating system.
Once you’ve created the ECS, log in to the virtual machine and install Docker using the following command:
sudo apt update && sudo apt-get install docker.io -y
After installing Docker, create a folder called “context” and navigate to it:
mkdir -p context && cd context
Once done, download the following PyTorch modules:
- torch-2.6.0+cu118-cp313-cp313-linux_x86_64.whl
- torchaudio-2.6.0+cpu-cp313-cp313-linux_x86_64.whl
- torchvision-0.21.0+cu118-cp313-cp313-linux_x86_64.whl
wget https://download.pytorch.org/whl/cu118/torch-2.6.0%2Bcu118-cp313-cp313-linux_x8 6_64.whl#sha256=8d30eb2870ffe05d81ec513bdb08c0f2bab9fd1bd4fbc6e5681fad855c7b99e3

wget https://download.pytorch.org/whl/cpu/torchaudio-2.6.0%2Bcpu-cp313-cp313-linux_x8 6_64.whl#sha256=6fae44f4d5b401a048f997d2fedf43566634b45e44950224b2b99ea1db18c68a

wget https://download.pytorch.org/whl/cu118/torchvision-0.21.0%2Bcu118-cp313-cp313-linux_x86_64.whl#sha256=2e85300054af1feda7213f578039097ec816683a7ef0b6e199be17f70e220a53
Also download Minoconda3:
- Miniconda3-py313_25.7.0-2-Linux-x86_64.sh
wget https://repo.anaconda.com/miniconda/Miniconda3-py313_25.7.0-2-Linux-x86_64.sh
Once done, the folder structure “context” should be as follows:
context
├── Miniconda3-py313_25.7.0-2-Linux-x86_64.sh
├── torch-2.6.0+cu118-cp313-cp313-linux_x86_64.whl
├── torchaudio-2.6.0+cpu-cp313-cp313-linux_x86_64.whl
└── torchvision-0.21.0+cu118-cp313-cp313-linux_x86_64.whl
Create a file named “Dockerfile” and then paste the following contents:
# The host must be connected to the public network for creating a container image.

# Base container image at https://github.com/NVIDIA/nvidia-docker/wiki/CUDA
#
# https://docs.docker.com/develop/develop-images/multistage-build/#use-multi-stage-builds
# require Docker Engine >= 17.05
#
#builder stage
FROM nvidia/cuda:13.0.1-cudnn-runtime-ubuntu22.04 AS builder

# The default user of the base container image is root.
# USER root

#Python 3.13
ENV DEBIAN_FRONTEND=noninteractive
ENV TZ=America/New_York

RUN apt update && apt install software-properties-common -y && add-apt-repository ppa:deadsnakes/ppa && apt update && apt install python3.13 -y

# Copy the installation files to the /tmp directory in the base container image.
COPY Miniconda3-py313_25.7.0-2-Linux-x86_64.sh /tmp
COPY torch-2.6.0+cu118-cp313-cp313-linux_x86_64.whl /tmp
COPY torchvision-0.21.0+cu118-cp313-cp313-linux_x86_64.whl /tmp
COPY torchaudio-2.6.0+cpu-cp313-cp313-linux_x86_64.whl /tmp

# https://conda.io/projects/conda/en/latest/user-guide/install/linux.html#installing-on-linux
# Install Miniconda3 to the /home/ma-user/miniconda3 directory of the base container image.
RUN bash /tmp/Miniconda3-py313_25.7.0-2-Linux-x86_64.sh -b -p /home/ma-user/miniconda3

# Install torch*.whl using the default Miniconda3 Python environment in /home/ma-user/miniconda3/bin/pip.
RUN cd /tmp && \
/home/ma-user/miniconda3/bin/pip install --no-cache-dir \
/tmp/torch-2.6.0+cu118-cp313-cp313-linux_x86_64.whl \
/tmp/torchvision-0.21.0+cu118-cp313-cp313-linux_x86_64.whl \
/tmp/torchaudio-2.6.0+cpu-cp313-cp313-linux_x86_64.whl

# Create the final container image.
FROM nvidia/cuda:13.0.1-cudnn-runtime-ubuntu22.04

# Install vim and cURL in the open-source image site.
RUN apt-get update && \
apt-get install -y vim curl && \
apt-get clean

# Add user ma-user (UID = 1000, GID = 100).
# A user group whose GID is 100 of the base container image exists. User ma-user can directly use it.
RUN useradd -m -d /home/ma-user -s /bin/bash -g 100 -u 1000 ma-user

# Copy the /home/ma-user/miniconda3 directory from the builder stage to the directory with the same name in the current container image.
COPY --chown=ma-user:100 --from=builder /home/ma-user/miniconda3 /home/ma-user/miniconda3

# Configure the preset environment variables of the container image.
# Set PYTHONUNBUFFERED to 1 to avoid log loss.
ENV PATH=$PATH:/home/ma-user/miniconda3/bin \
PYTHONUNBUFFERED=1

# Set the default user and working directory of the container image.
USER ma-user
WORKDIR /home/ma-user
Verify that the contents of the “context” folder will be as follows:
context
├── Dockerfile
├── Miniconda3-py313_25.7.0-2-Linux-x86_64.sh
├── torch-2.6.0+cu118-cp313-cp313-linux_x86_64.whl
├── torchaudio-2.6.0+cpu-cp313-cp313-linux_x86_64.whl
└── torchvision-0.21.0+cu118-cp313-cp313-linux_x86_64.whl
Once done, build the image using the following command:
docker build . -t model-arts:1.0
SWR
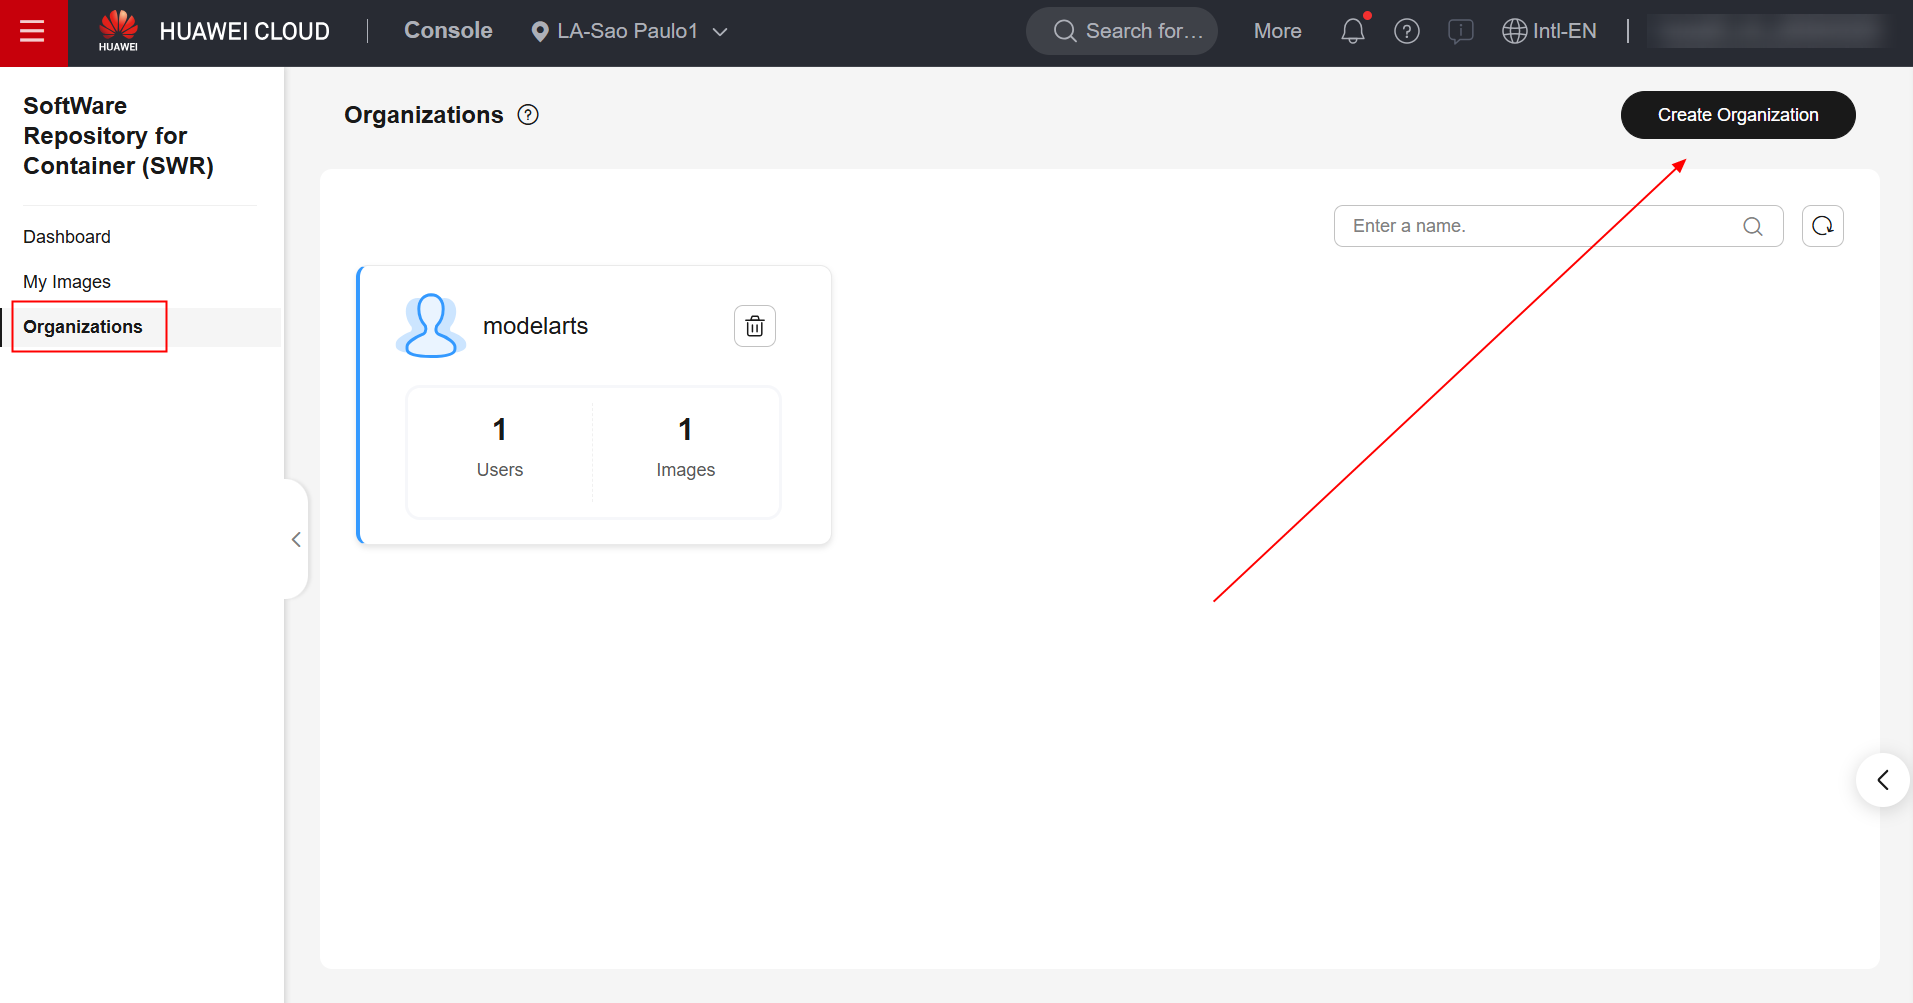
Once you’ve built the image, navigate to the SWR service in the Huawei Cloud console and create an organization.
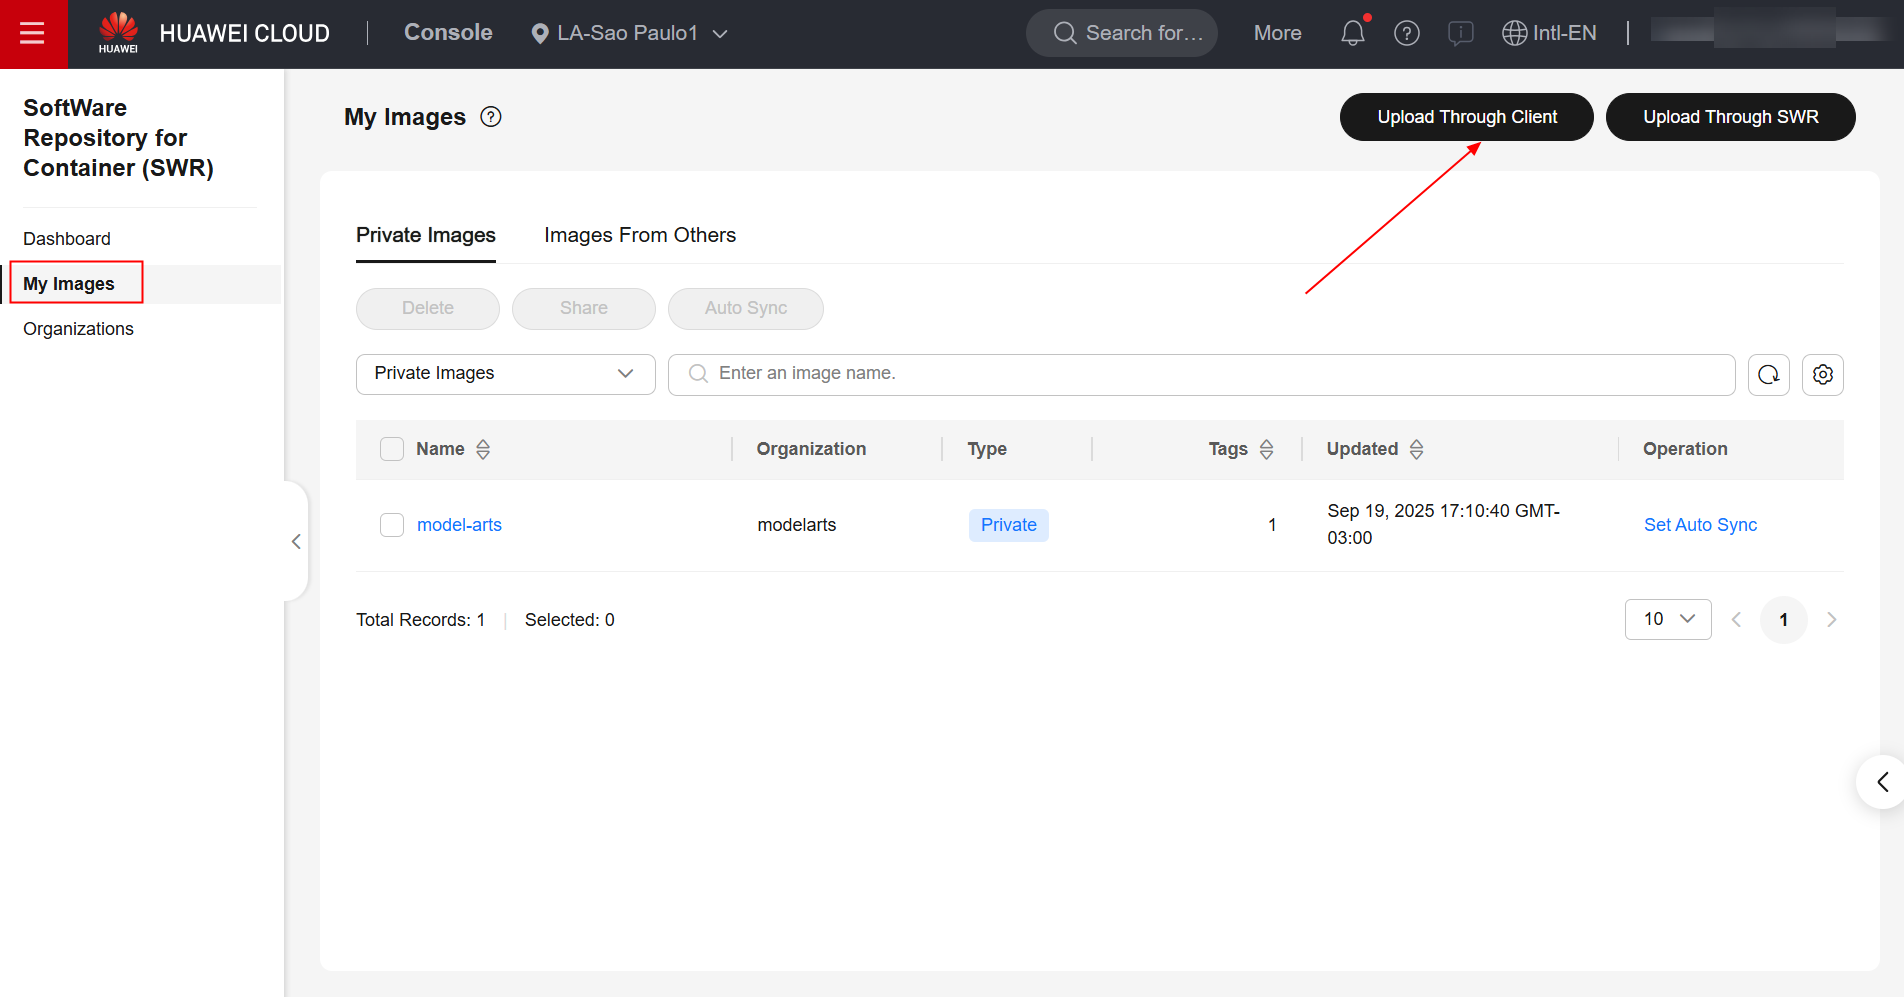
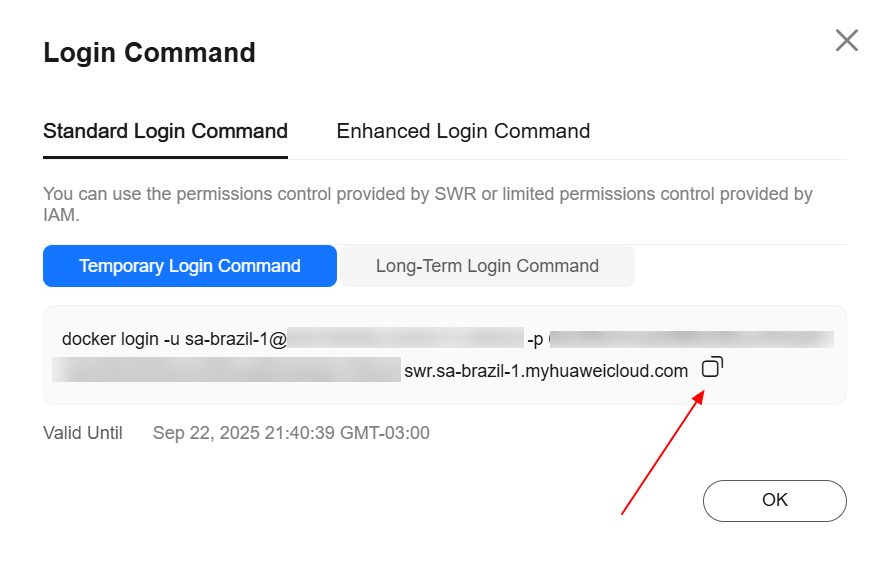
After creating the organization, navigate to the “My Images” section in the left panel and click “Upload Through Client.” Once done, click “Generate Login Command,” copy the generated login command, and paste it into the ECS.
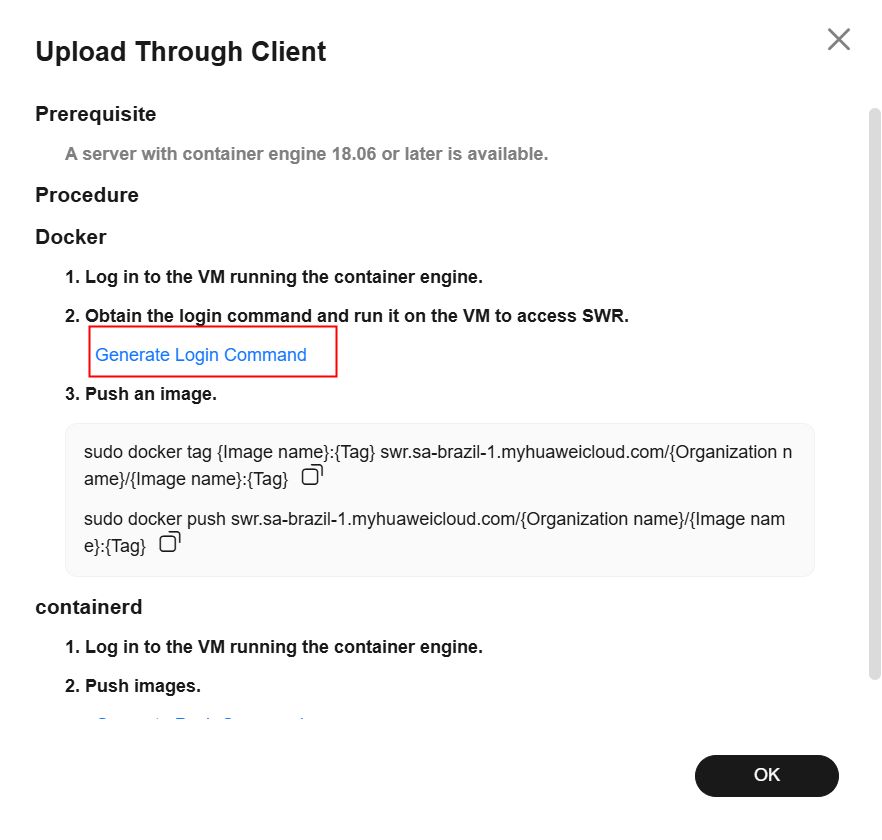

Enter the following command to assign a tag to the image, replacing the region, domain, and organization information with the actual values:
sudo docker tag model-arts:1.0 swr.{region-id}.{domain}/{organization-name}/model-arts:1.0
Enter the following command to upload the image to the SWR repository, replacing the region, domain, and organization information with the actual values:
sudo docker push swr.{region-id}.{domain}/{organization-name}/model-arts:1.0
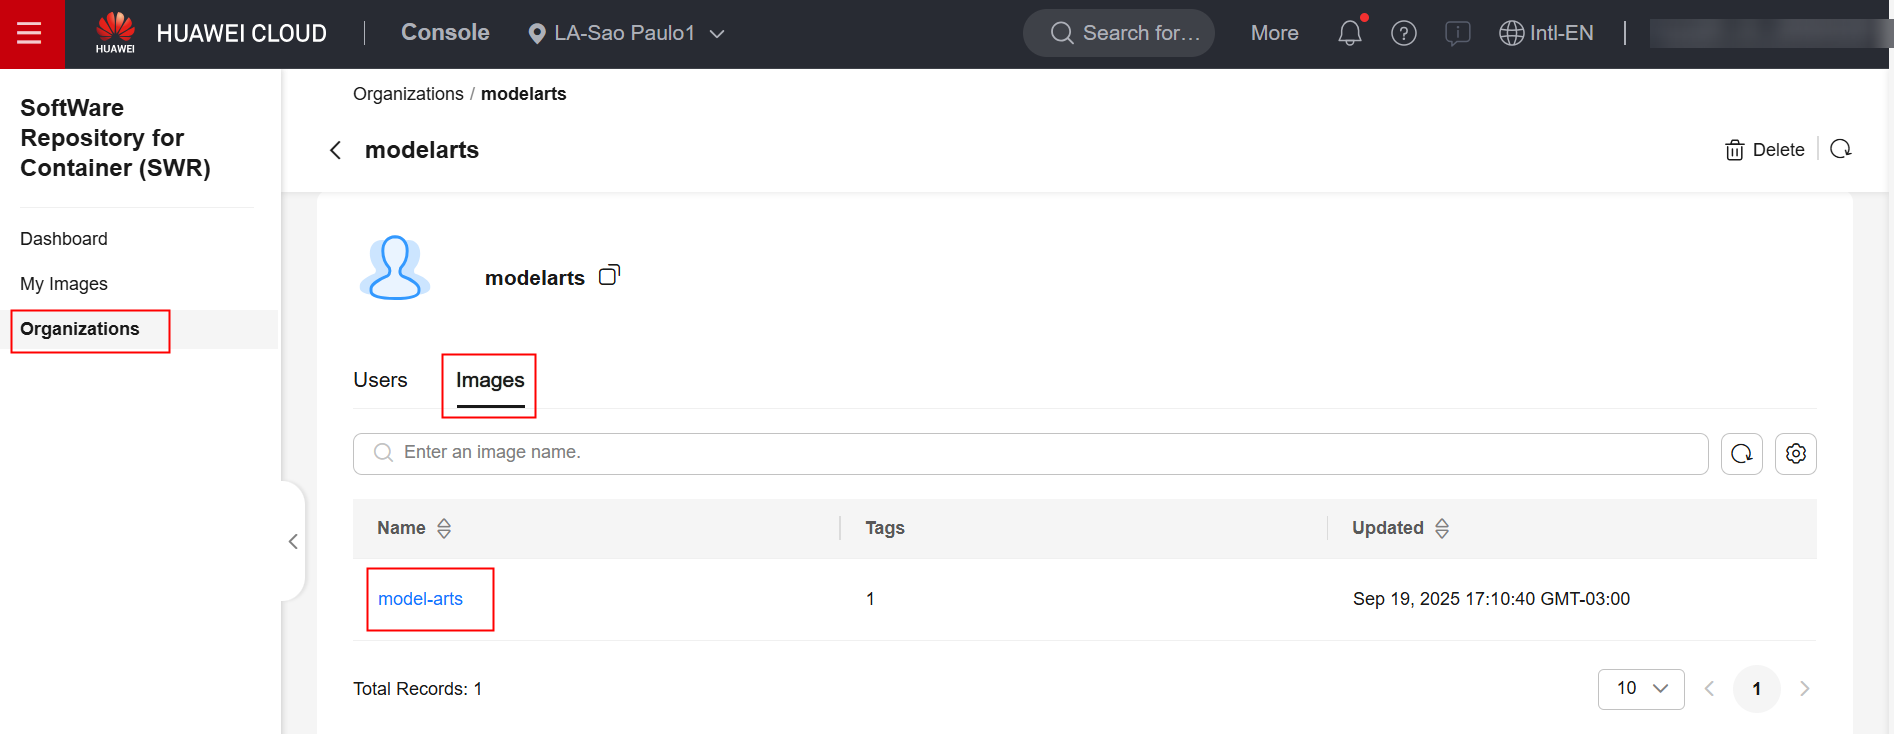
Verify in the SWR console that the image was successfully transferred to the SWR repository:
ModelArts
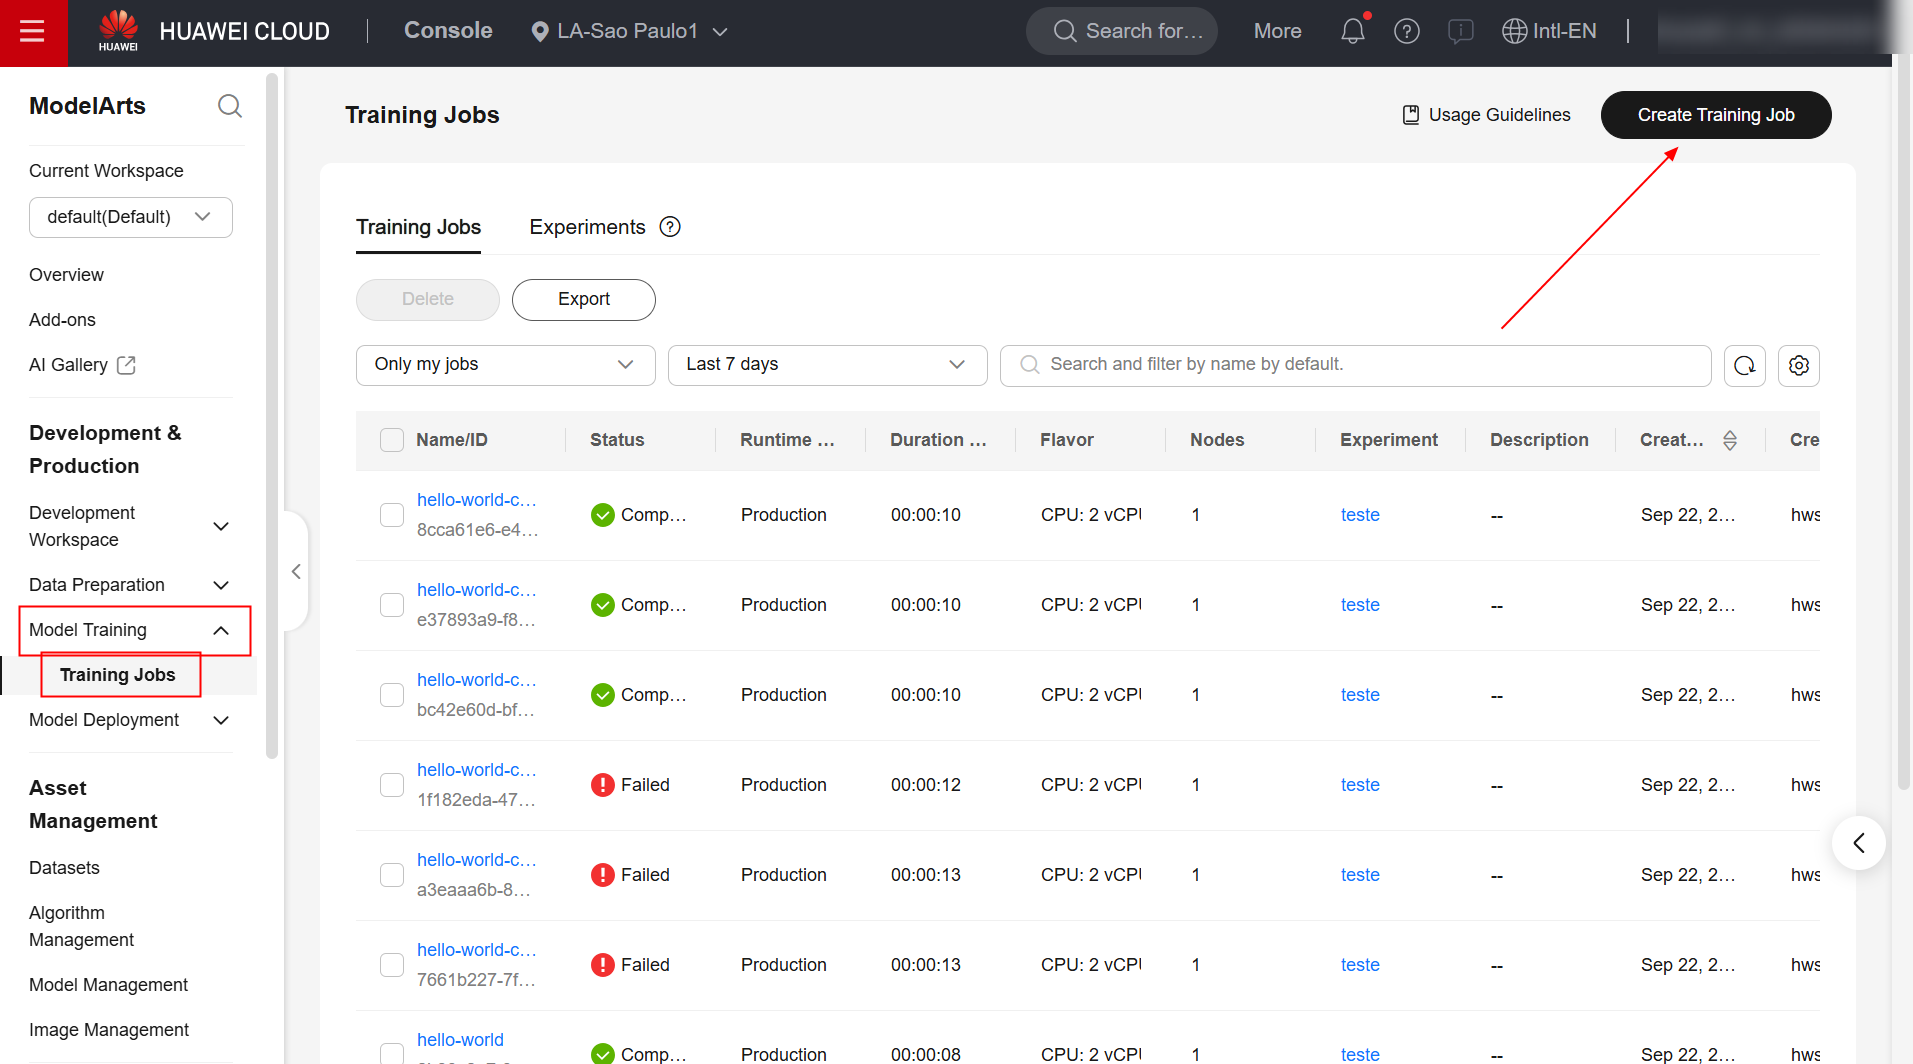
To create a model training job in the ModelArts service, first navigate to the product page in the Huawei Cloud console and click “Create Training Job.”
Fill in the “Algorithm Type”, “Boot Mode”, “Image”, “Boot Command”, and “Job Log Path” fields as specified below. For all other configurations, retain the defaults.

/home/ma-user/miniconda3/bin/python3.13 \${MA_JOB_DIR}/code/teste.py
Once done, confirm the creation of the job and wait for it to complete.
Example
Check the execution logs for the training task:
References
- ModelArts documentation:
https://support.huaweicloud.com/intl/en-us/docker-modelarts/develop-modelarts-0097.html
- ModelArts documentation:
https://support.huaweicloud.com/intl/en-us/develop-modelarts/develop-modelarts-0011.html