DNS + WAF Configuration Guide
V1.0 – March 2024
| Version | Author | Description |
|---|---|---|
| V1.0 – 2024-18-03 | Gustavo Marques Scovini g50037306 | Initial Version |
| V1.0 – 2024-18-03 | Leandro Ramos l50032583 | Initial Version |
Domain Purchase
Buy a domain
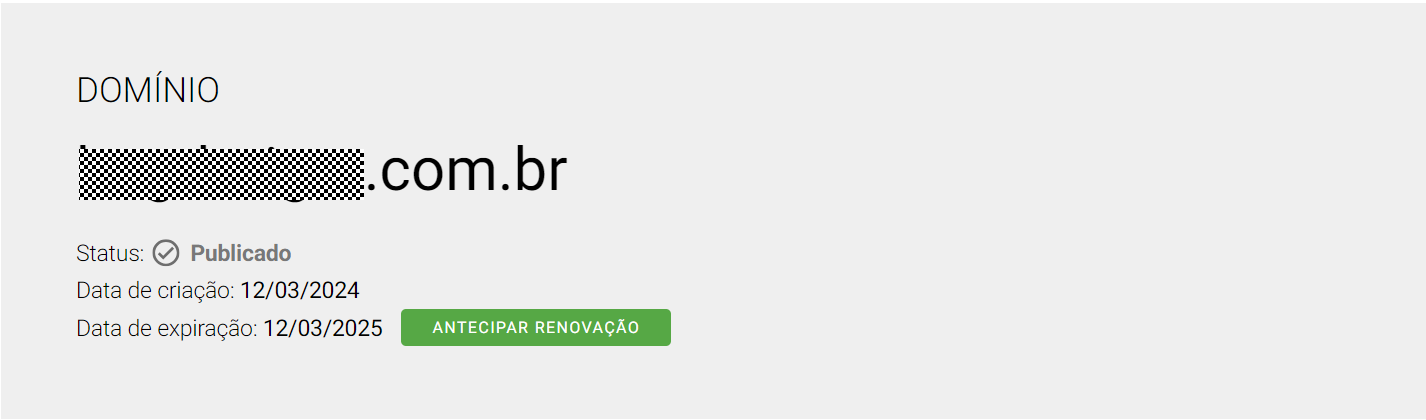
First of all, it is necessary to acquire a valid domain from a certified domain provider to register your DNS. In this example, a domain has been purchased in registro.br:
DNS Configuration
DNS (Domain Name System) serves a critical function by translating human-readable domain names into machine-understandable IP addresses. Huawei Cloud offers robust capabilities for configuring and managing DNS records, enabling users to efficiently route domain traffic to designated servers. Below is a streamlined guide detailing the steps to configure DNS within Huawei Cloud:
-
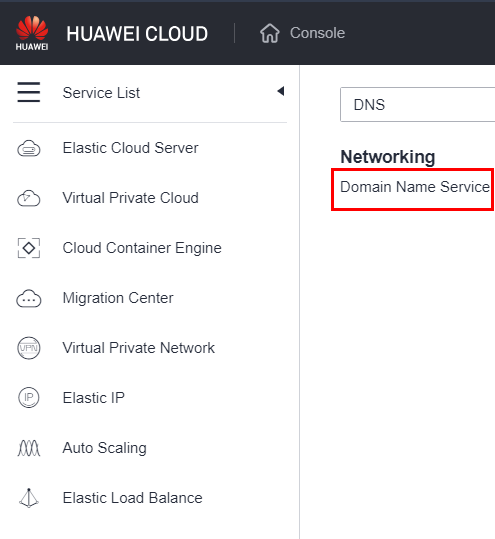
Accessing DNS Service: Initiate the process by navigating to the DNS service within Huawei Cloud.
-
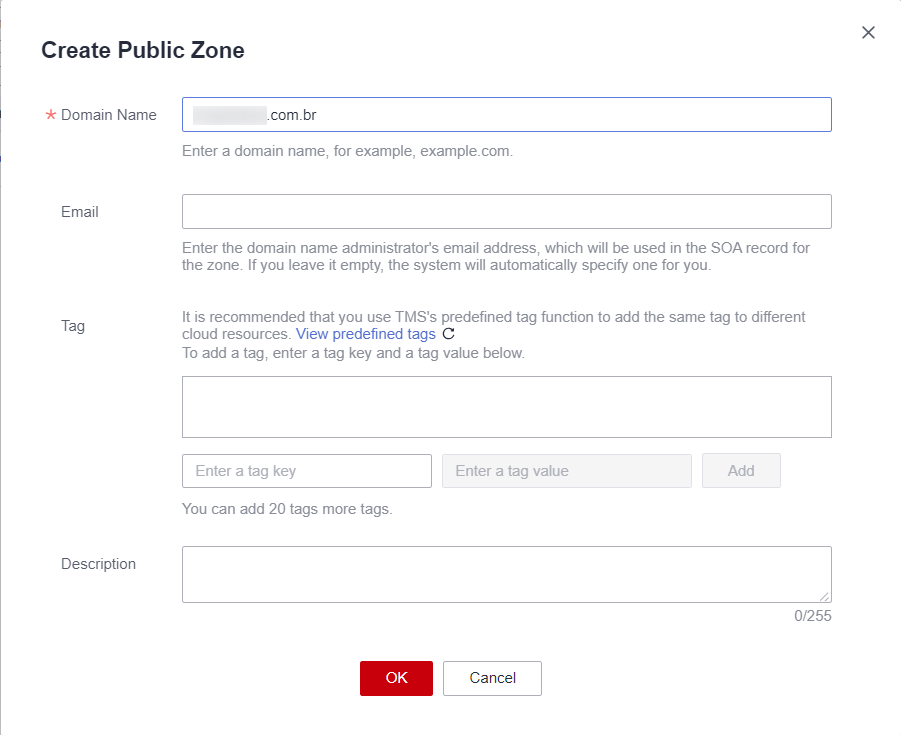
Creating a Public Zone: Begin by establishing a Public Zone within Huawei Cloud. This step is fundamental for subsequent DNS configurations:
Navigate to Public Zones > Create Public Zone
Input your domain name exactly as registered with your provider and then follow the provided instructions to complete the setup process.
Update the domain management to Huawei Cloud
After successfully creating a Public Zone, the next step is to redirect our domain to Huawei Cloud DNS. To accomplish this, we must retrieve the Huawei Cloud DNS domains. Here’s how to proceed:
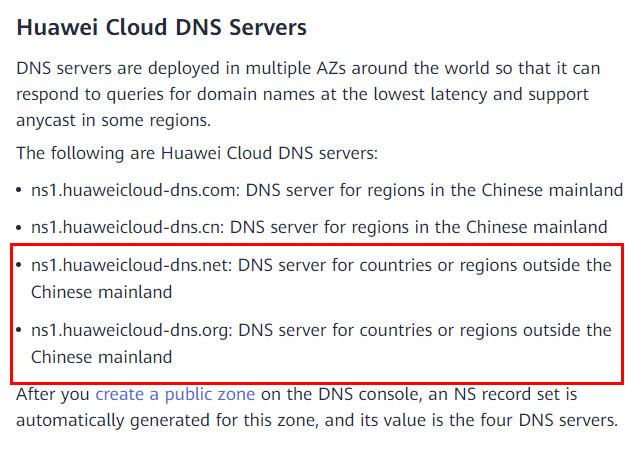
In the domain provider where you purchased your domain, you need to update the DNS settings to point your domain to the two DNS servers provided by Huawei Cloud. This action effectively connects your domain to Huawei Cloud’s DNS infrastructure.
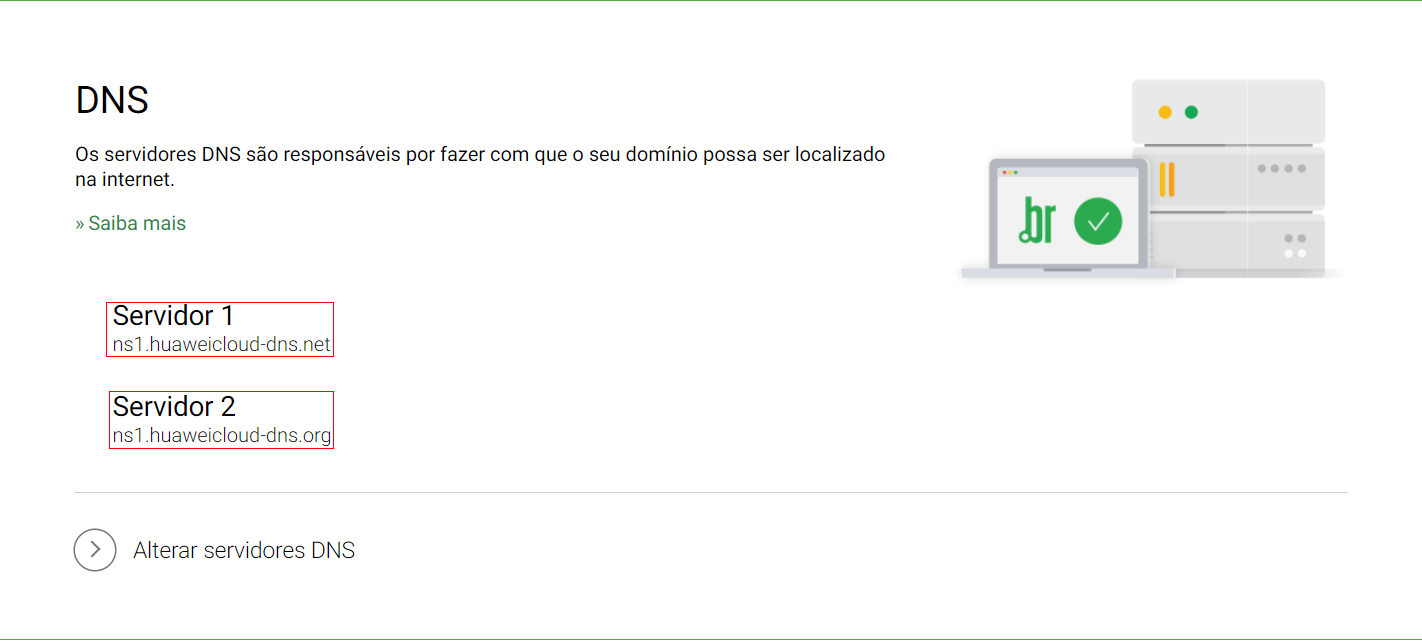
The DNS update may take up to 48 hours to propagate and fully refresh globally.
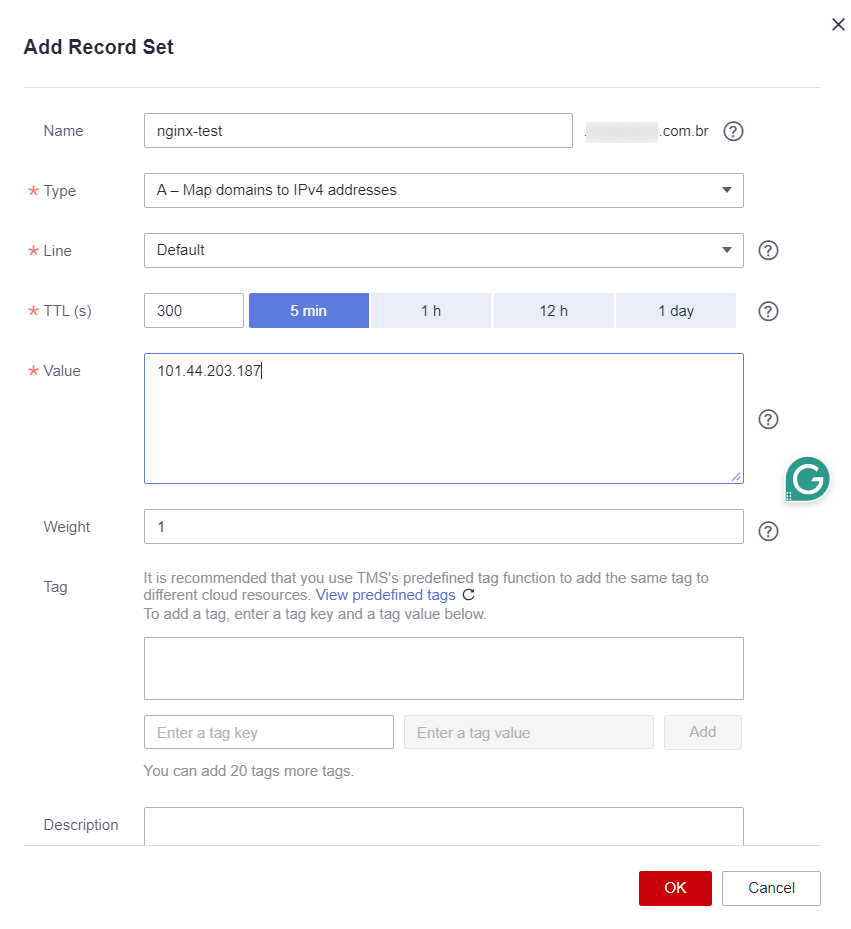
With the DNS domain manager now transitioned to Huawei Cloud, we can proceed to create record sets to precisely direct traffic to our desired destinations. For instance, if we wish to point a domain name to an IPv4 address, like an ECS (Elastic Compute Service) instance hosting an NGINX server with the public IP 101.44.203.187, we utilize a Record Set A.
In this example, we have an ECS with an NGINX server installed in it with the public IP 101.44.203.187, if we want to point a Domain name to that IPv4, we create a Record Set A – Map domains to IPv4 Addresses, and in the value, we put the IP that we want to translate:
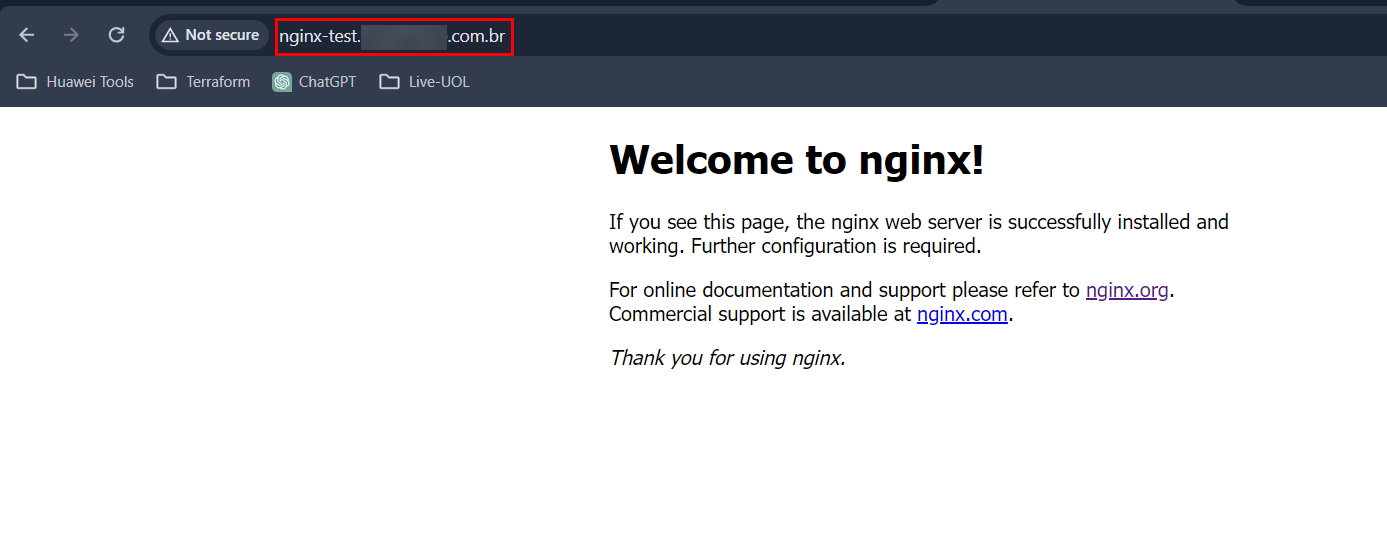
Now, if we type nginx-test.example.com.br, it will redirect the NGINX application:
WAF (Web Application Firewall) Configuration
WAF (Web Application Firewall) serves as a crucial security measure safeguarding applications and websites against various online threats, including SQL injection, Cross-Site Scripting (XSS), and Distributed Denial of Service (DDoS) attacks.
In this scenario, let’s consider an ECS instance running Ubuntu 22.04 hosting a basic NGINX application with the IP address 1.178.38.186. Additionally, we have a DNS entry “nginx-waf.example.com.br” pointing to the Elastic IP (EIP) associated with this ECS instance.
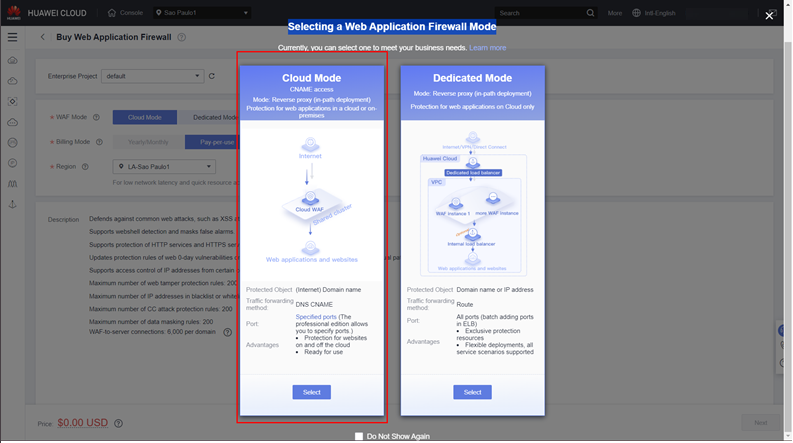
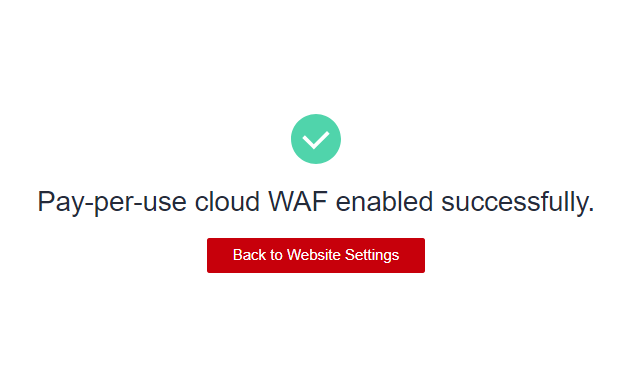
Purchase a WAF pay-per-use instance
First, we need to purchase an instance of Web Application Firewall in the console, to do that go to Service List > Web Application Firewall > Buy WAF > Cloud Mode.
Just check the box in the note value and click Next.
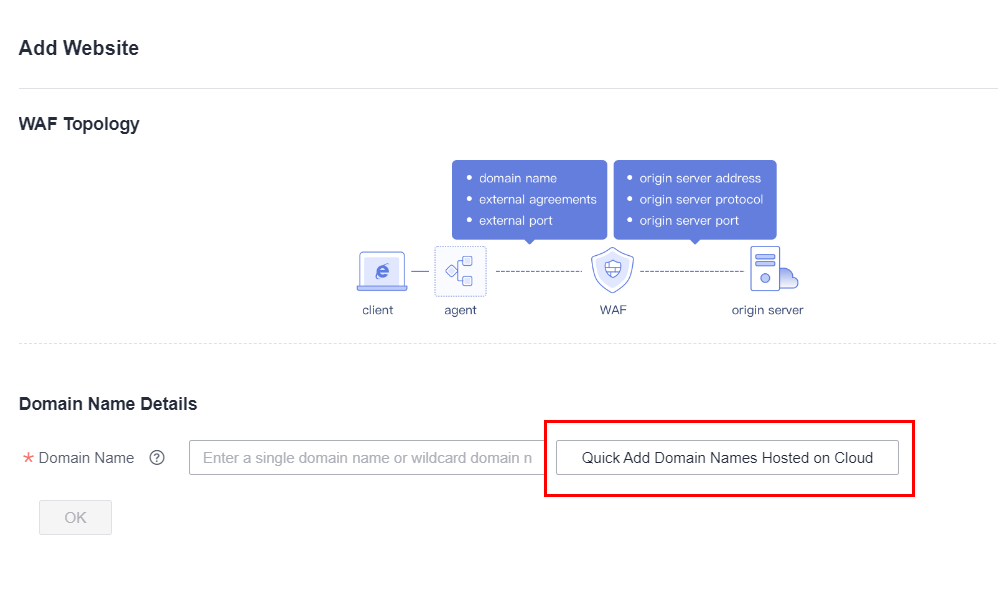
Adding a website to the WAF
To secure your website with WAF, navigate to the WAF console and access the “Website Settings” section. Then, proceed to add the desired website by following these steps: 
Select Cloud – CNAME > Quick Add Domain Names Hosted on Cloud
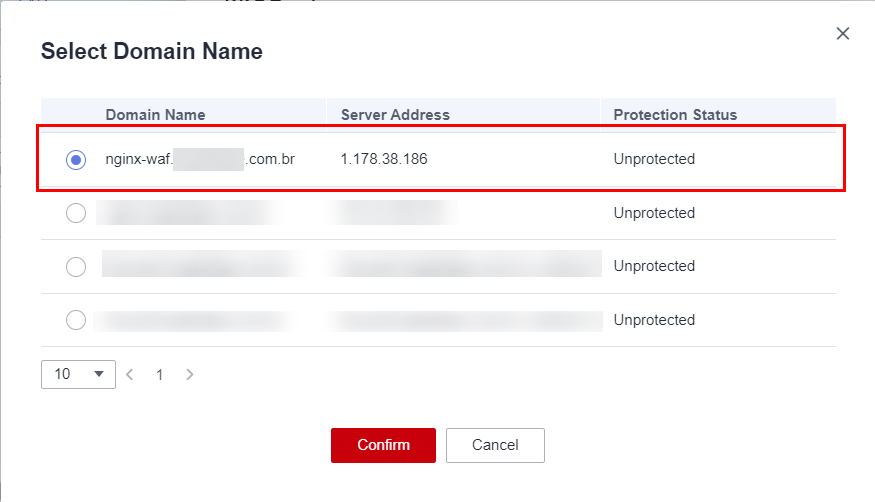
Select your domain, in this case, it’s nginx-waf.example.com.br
-
Website name: WAF-guide
-
Domain name: nginx-waf.example.com.br
-
Website Remarks: Default
-
Protected Port: Standard port
-
Server Configuration
-
Client Protocol: HTTP
-
Server Protocol: HTTP
-
Server Address: IPv4 - 1.178.38.186 #Change based on your IP
-
Server Port: 80
-
-
Proxy configured: No proxy
-
Policy: System-generated policy
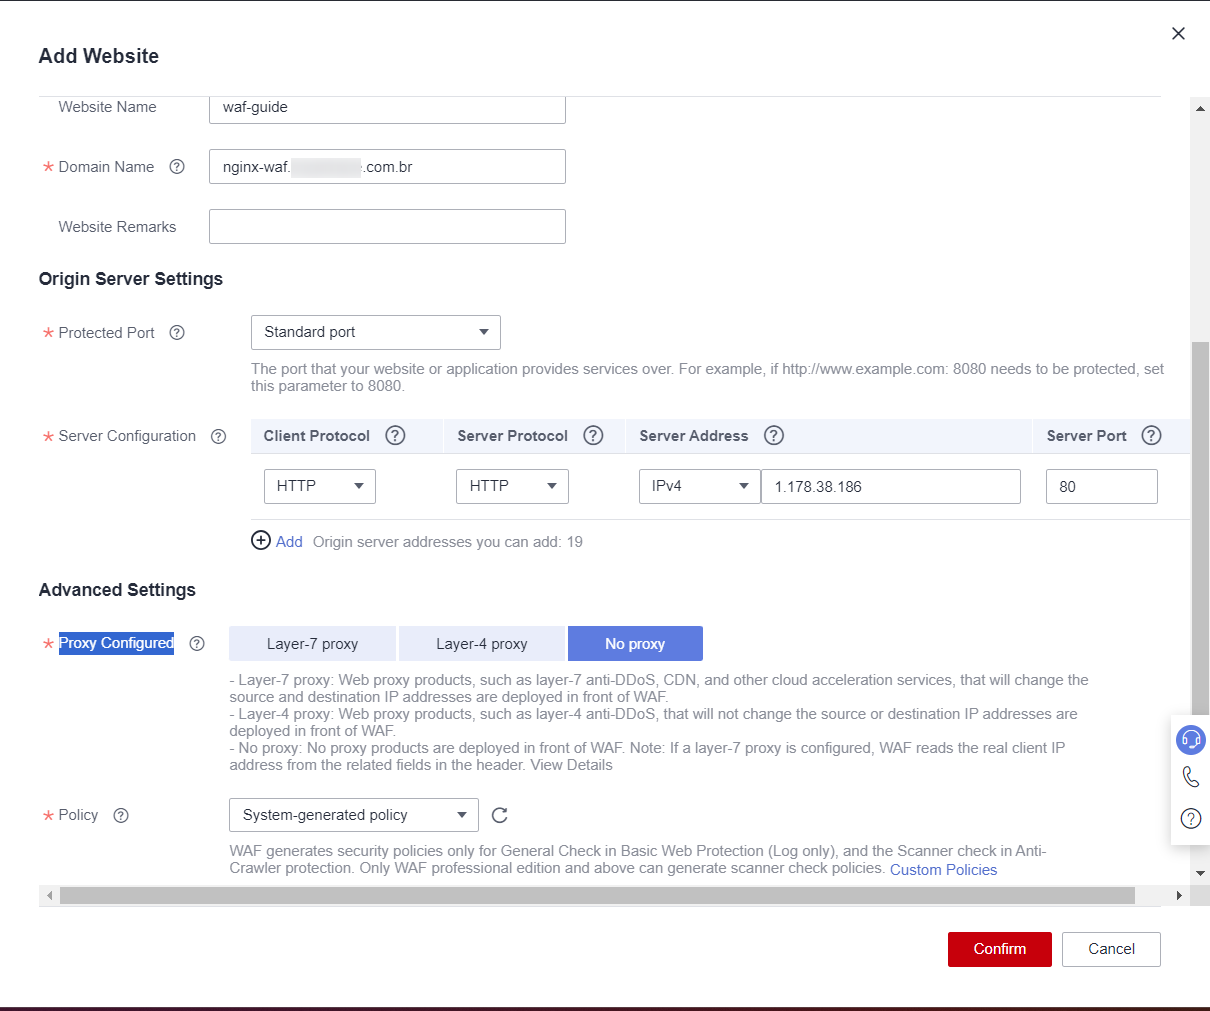
Click on Next.
WAF configuration
Now that we added a website to WAF, we need to configure our origin server and DNS to work with WAF.
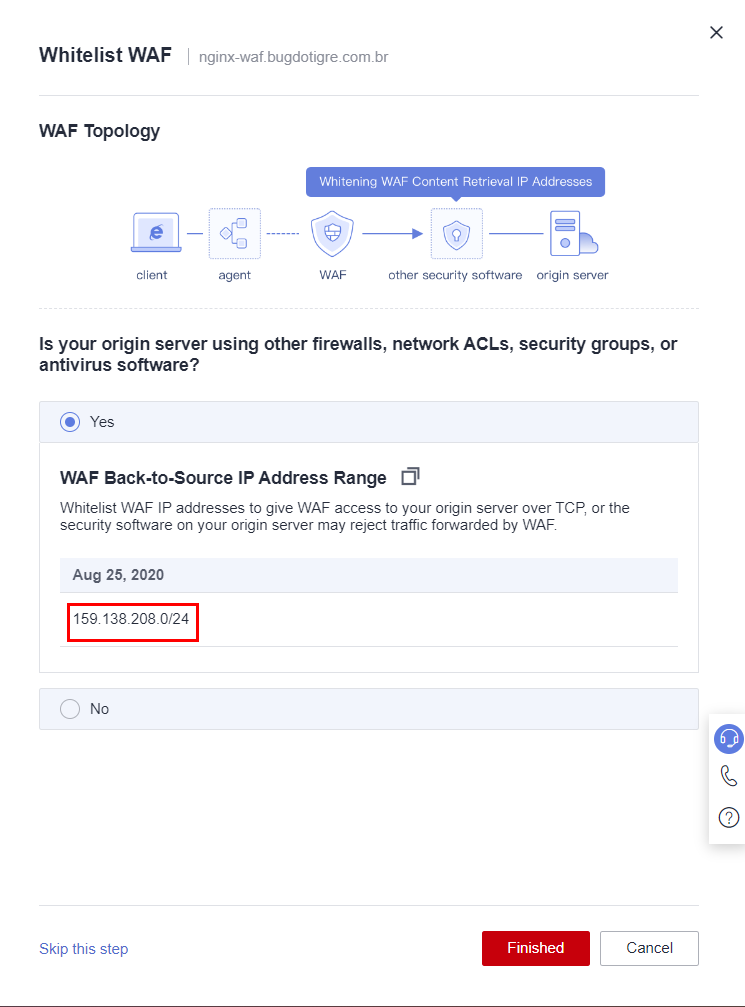
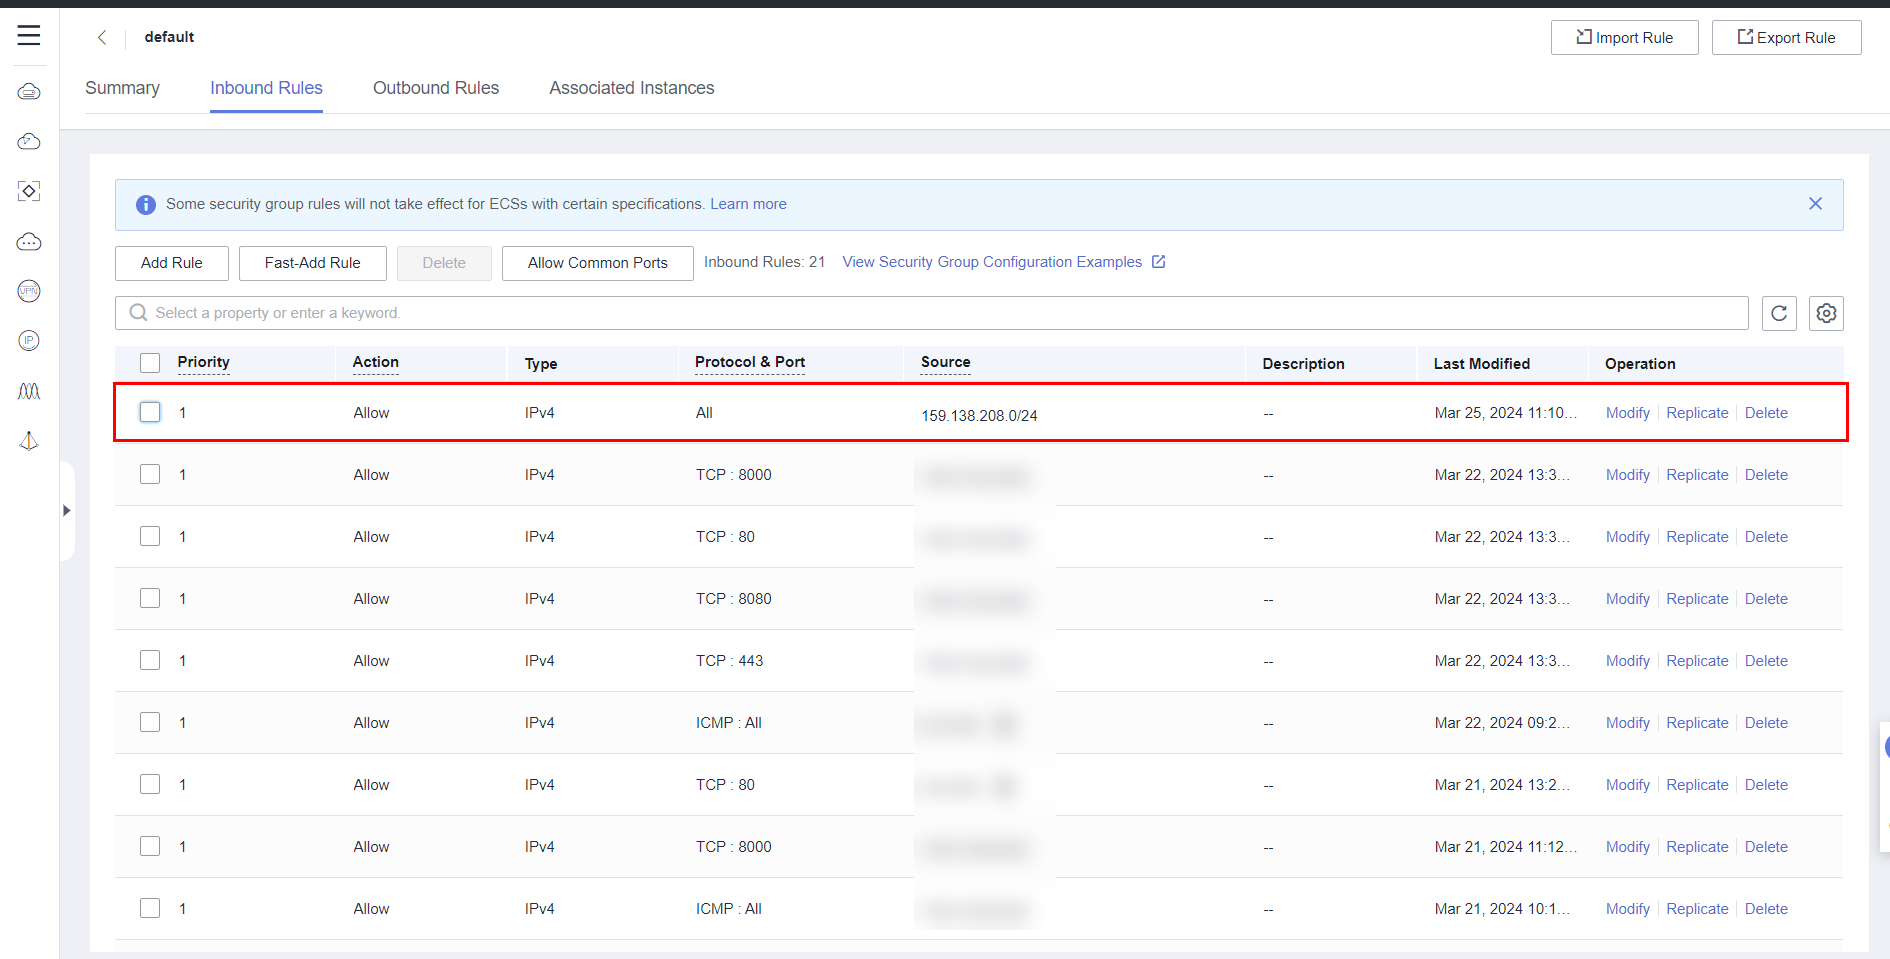
Whitelist WAF
First, we`ll whitelist the WAF IP range to all ports in the security group:

Now, we go back to the WAF console page and click Finished.
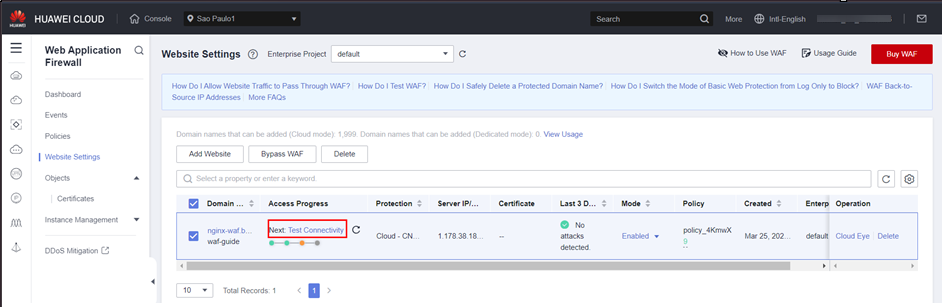
Testing WAF CNAME
Click on Test connectivity on the website:
Follow the steps in the guide that shows on the right side of your screen:
- Copy the CNAME Record and ping this CNAME in your ECS, copy the IP of the WAF.

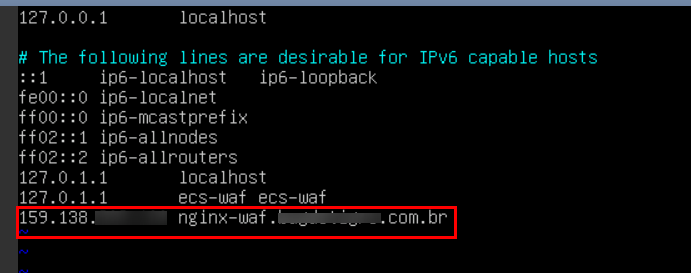
Now we need to add this WAF IP and the DNS to the trusted host list of our NGINX server, in Ubuntu, we use the command:
sudo vim /etc/hosts
After that, we need to flush the DNS, with the command:
resolvectl flush-caches
Attempt to ping “nginx-waf.example.com.br” from the ECS. The displayed IP address should correspond to the WAF IP.
Configure DNS to redirect to WAF
In this step, it’s needed to update our DNS settings to direct traffic to the WAF instead of our application. The WAF will then redirect the traffic to our server: 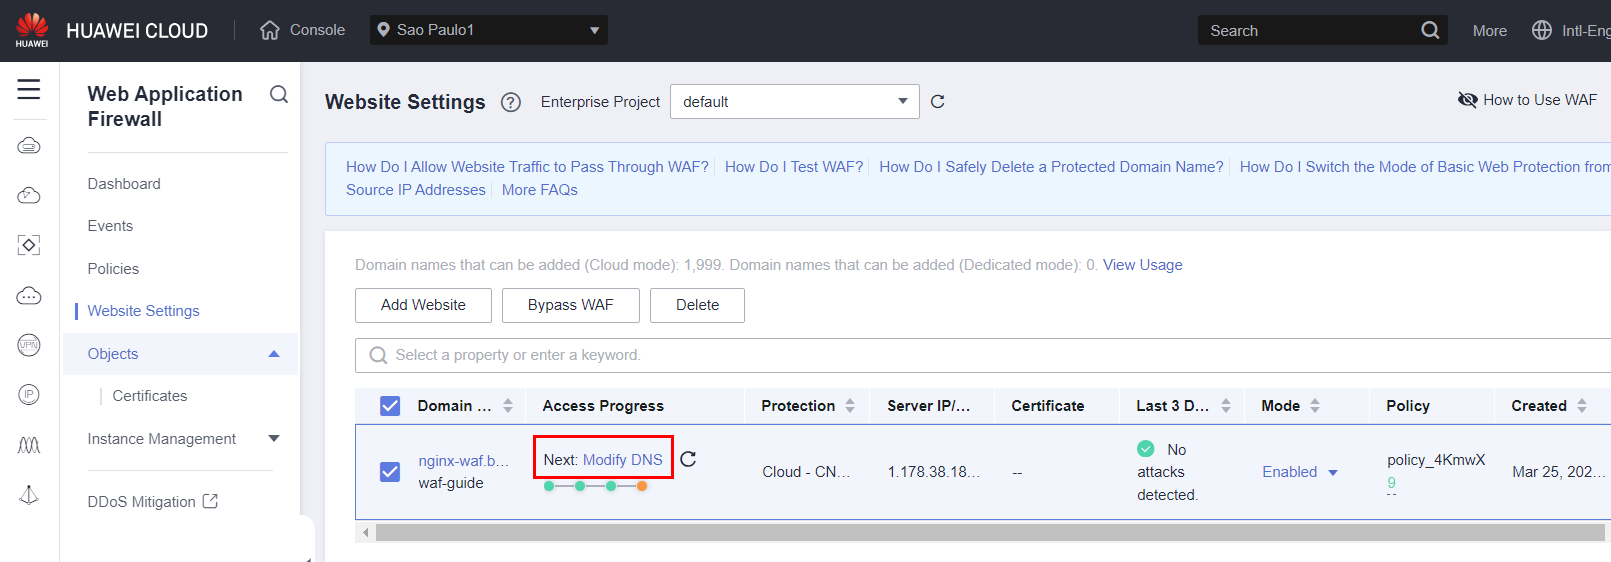
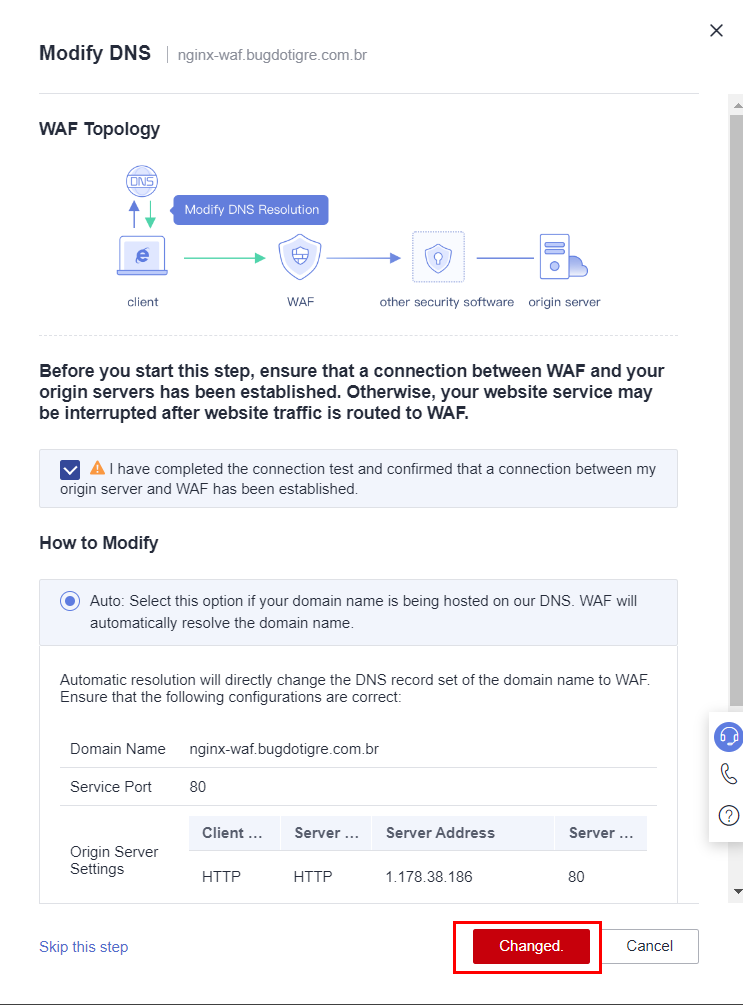
Please ensure that the connection between WAF and your server has been successfully established before proceeding.
To configure WAF effectively, you need to adjust DNS settings. Start by removing the existing A-type record for “nginx-waf.example.com.br”. Then, create a new record set using the CNAME type. Specify the desired domain name, like “nginx-waf.example.com.br”, and point it to the domain provided by the WAF service. 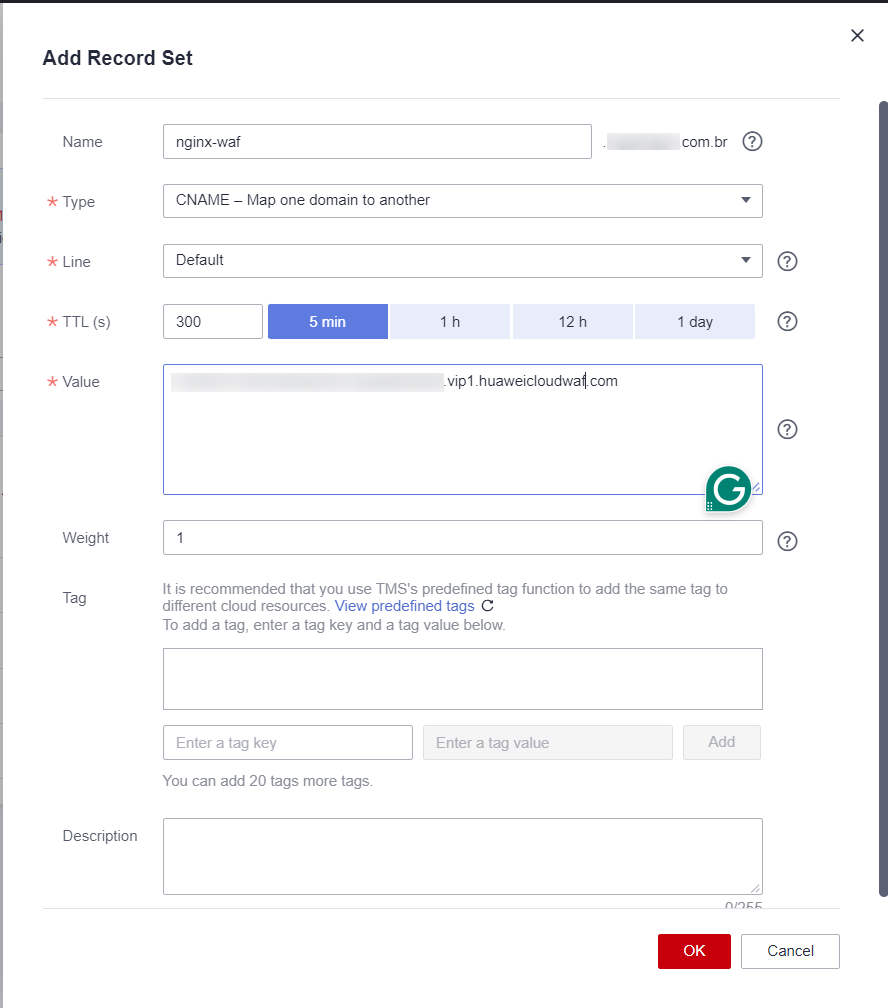
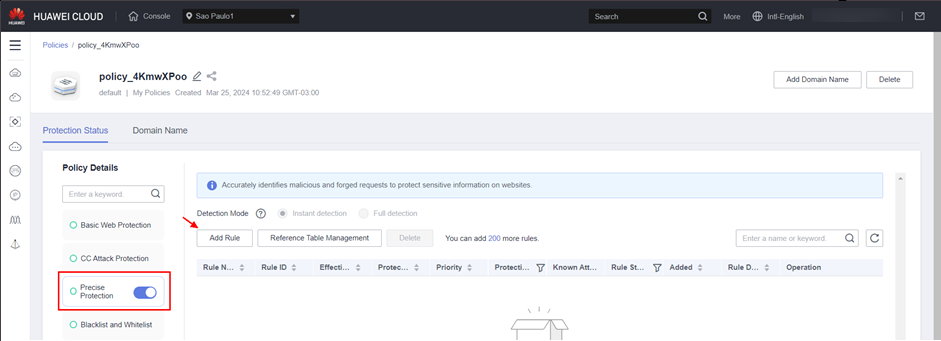
Testing WAF Precise Protection
In the WAF console, access the auto-generated policy and create a Precise Protection rule to block all traffic for a test: 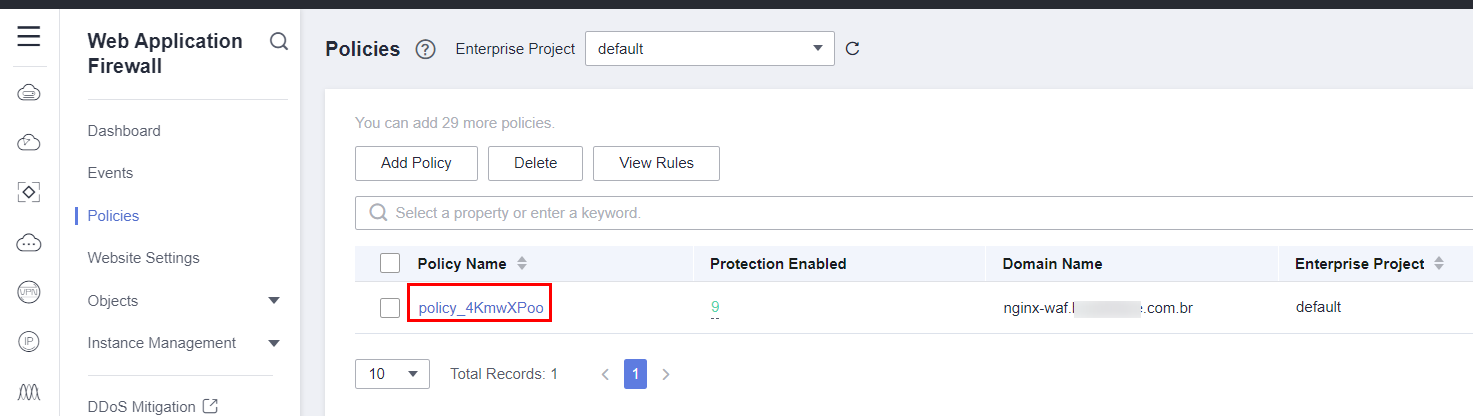
Go to Precise Protection > Add Rule:
Just add a “/” in the “Content” value and retain other values in default:
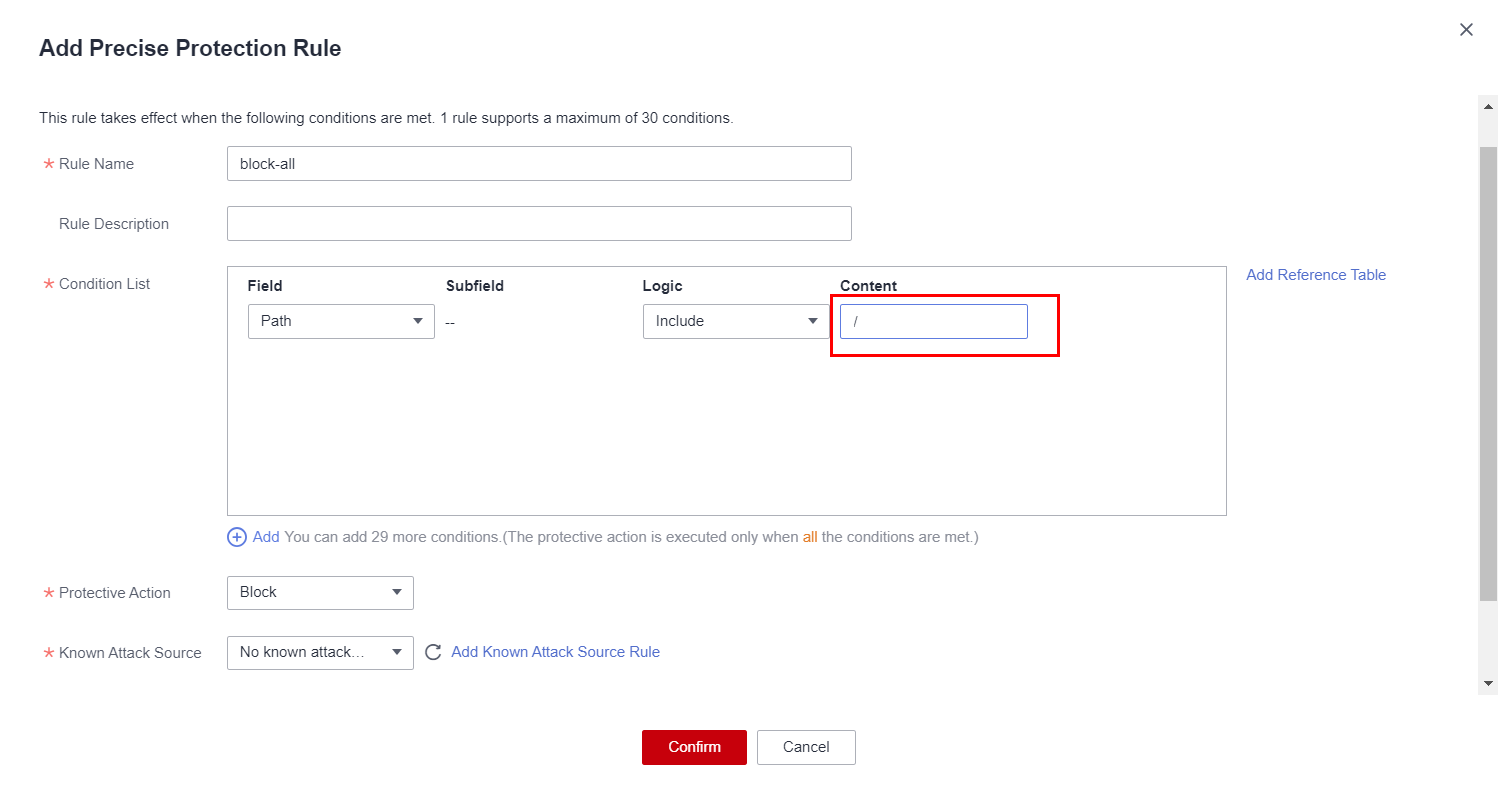
Click Confirm, then OK.
Now, if we attempt to access our “nginx-waf.example.com.br” address, the configured WAF rule will block all incoming traffic.
